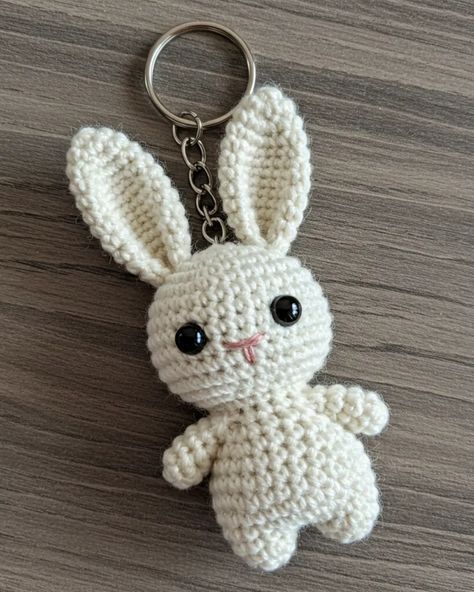
Cute crochet bunny tutorial

If you’re looking for a fun, quick, and adorable crochet project, this Crochet Duck Keychain 🐥-Step by Step Tutorial is perfect for you! This cute little keychain is a wonderful handmade accessory that adds a touch of charm to your keys, bags, or even as a lovely gift. The best part about this tutorial is that it’s easy to follow, even if you’re a beginner. Using just a few materials and simple crochet stitches, you’ll create a delightful duck keychain that will surely make everyone smile.
The Crochet Duck Keychain 🐥-Step by Step Tutorial is designed to help crafters of all skill levels achieve a professional and adorable result. Whether you’re crocheting for fun, to give gifts, or to sell at craft fairs, this mini project is a great way to practice your skills while making something useful. With just a small amount of yarn, a hook, and some creativity, you can bring this tiny duck to life. Plus, it’s a great way to use up leftover yarn from other projects.
Crochet enthusiasts love projects like this because they combine creativity with practicality. This Crochet Duck Keychain 🐥-Step by Step Tutorial not only helps you refine your crochet techniques but also gives you a unique handmade piece that reflects your personality. From choosing the perfect yarn color to assembling the cute duck features, every step is enjoyable. Let’s dive into this fun tutorial and learn how to make your own crochet duck keychain that’s as charming as it is easy to create!
To begin your Crochet Duck Keychain 🐥-Step by Step Tutorial, it’s important to gather all your materials before you start. This will make the process smooth and enjoyable. You don’t need many supplies, and most of them are probably already in your craft box.
You will need some soft yarn in yellow for the duck’s body and orange for the beak and feet. Cotton yarn is a great choice for small projects like this since it provides good stitch definition and durability. You’ll also need a crochet hook that matches your yarn weight — typically a 2.5 mm or 3 mm hook works well. Don’t forget to grab a pair of scissors, a yarn needle, and some fiberfill stuffing to give your duck a nice shape.
Safety eyes or small black beads will add a cute expression to your duck, but if you prefer, you can embroider the eyes with black yarn or thread. This makes the project safer if it’s intended for children. You’ll also need a keyring or keychain clasp to attach your finished duck. These can be found at most craft stores or repurposed from old keychains you already have.
Keep all your materials within easy reach before starting the Crochet Duck Keychain 🐥-Step by Step Tutorial. This preparation step is simple but makes a big difference in how smoothly your project goes. Having everything organized will help you enjoy the creative process without interruptions.
Once your materials are ready, make sure you’re comfortable and have good lighting. Crocheting small items like this requires attention to detail, especially when shaping the duck’s head and body. Being patient and working at your own pace will ensure the best results. Remember, this project is meant to be fun, not stressful, so take your time and enjoy every stitch!
Finally, double-check your tools and materials before you start crocheting. It’s always easier to fix small mistakes early on. With everything set, you’re ready to move on to the fun part — crocheting the adorable duck step by step!
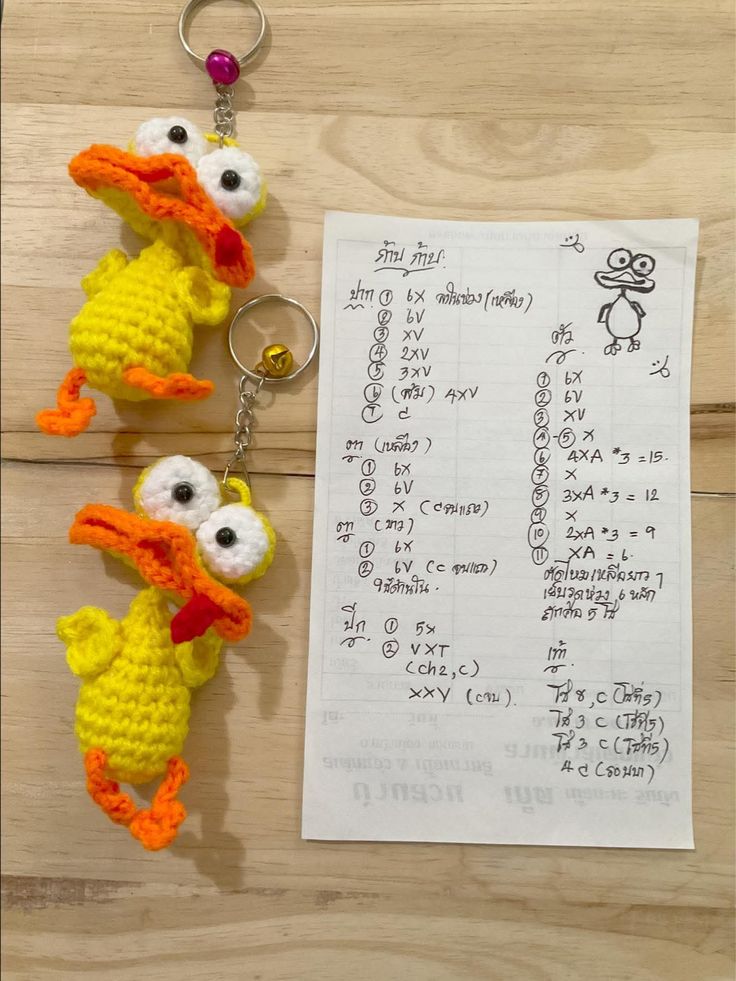
Now that you’ve gathered all the materials, let’s begin the Crochet Duck Keychain 🐥-Step by Step Tutorial. Start with the duck’s head and body, which are worked in continuous rounds using the amigurumi technique. Begin by making a magic ring and crocheting six single crochets into the ring. Pull tight to close, and you have your first round!
Continue increasing the stitch count evenly to form a small sphere for the duck’s head. For example, in the second round, make two single crochets in each stitch around. Then alternate single crochets and increases in the next rounds until the head reaches your desired size. This smooth, rounded shape will become the foundation for your keychain.
Once the head is complete, move on to the body. The body should be slightly smaller than the head, giving your duck a cute, cartoonish appearance. Follow the same process — start with a magic ring, increase evenly, and then decrease after a few rounds to form a slightly oval shape. Stuff the body firmly but not too tight, to keep it soft and squishy.
For the beak, use your orange yarn and make a small oval or triangle. This can be done by crocheting a chain of three stitches and working single crochets around it. Attach it to the center of the face using a yarn needle. Then, crochet two tiny wings in yellow and sew them to the sides of the body to complete the classic duck look.
Don’t forget the feet! These are optional but add a fun detail. Make two tiny orange pieces shaped like small flippers and sew them to the bottom. Now your duck is starting to come to life. Once all the parts are attached, insert the keyring through a small loop at the top of the head or sew it securely into place.
This step-by-step method ensures your duck looks neat and adorable. Even if it’s your first time following a Crochet Duck Keychain 🐥-Step by Step Tutorial, you’ll find it simple and rewarding. With practice, you’ll be able to create many in different colors for friends and family!
When making your Crochet Duck Keychain 🐥-Step by Step Tutorial, a few small tricks can make a big difference in the final look. First, maintain consistent tension throughout the project. Uneven tension can make the duck lopsided or cause gaps in the stitches. Practice on a small piece of yarn to ensure your stitches are even before starting the main body.
Another helpful tip is to stuff as you go. It’s much easier to fill small crochet pieces little by little instead of waiting until the end. Use small amounts of stuffing and push them in gently to keep the duck’s shape round and smooth. Too much stuffing can stretch the stitches, while too little can make it floppy.
When sewing the parts together, use a yarn needle and the same yarn used for the main pieces. This creates a seamless look and keeps the attachments strong. Make small, neat stitches and take your time with this step — it’s one of the keys to making your duck look professionally made.
Adding tiny details like blush cheeks or a mini bow can personalize your duck keychain. A little creativity goes a long way! You can also use different colors of yarn to create variations — for instance, a blue or pink duck for a themed collection.
Blocking isn’t necessary for this type of project, but if your stitches look uneven, gently shape the duck with your hands. The yarn will naturally adjust to the form. Lastly, always double-check that the keyring is firmly attached before using your new keychain. You want it to be secure and durable enough for daily use.
Each of these tips helps enhance your crochet experience and ensures your Crochet Duck Keychain 🐥-Step by Step Tutorial results in a beautiful finished piece you’ll be proud to show off or gift to others.
One of the best things about this Crochet Duck Keychain 🐥-Step by Step Tutorial is how versatile the finished piece can be. While it’s perfect as a keychain, you can also use it in many creative ways. Attach it to your handbag, backpack, or even as a cute zipper pull on your favorite jacket.
These crochet ducks also make charming gifts. Handmade keychains are thoughtful and personal presents that show effort and care. You can create several in different colors, add tiny accessories, and give them as small tokens of appreciation to friends, teachers, or coworkers.
If you enjoy selling handmade crafts, this project is a fantastic option. It’s quick to make, requires minimal materials, and appeals to people of all ages. The small size makes it ideal for craft fairs or online marketplaces. Plus, you can customize each duck to create unique designs that stand out.
You can even turn this into a fun family activity. Children can help choose yarn colors, stuff the pieces, or attach the keyring under supervision. Crafting together strengthens creativity and creates lovely memories.
Another great idea is to make seasonal or themed ducks. For example, a red duck for Valentine’s Day, a green one for St. Patrick’s, or a little Santa duck for Christmas. This adds a playful and festive touch to your collection.
Ultimately, the Crochet Duck Keychain 🐥-Step by Step Tutorial gives you a foundation for endless creativity. Once you’ve mastered the basic design, you can experiment and adapt it to suit your personal style.
1. What type of yarn is best for this project?
Cotton yarn is highly recommended for the Crochet Duck Keychain 🐥-Step by Step Tutorial because it provides structure and holds its shape well.
2. Can beginners make this keychain?
Yes! This project is beginner-friendly and uses basic stitches such as single crochet and slip stitch.
3. How long does it take to complete one duck keychain?
On average, it takes about 1 to 2 hours to finish, depending on your crochet speed and experience level.
4. Can I use different yarn weights?
You can, but remember that using thicker yarn will make a larger duck, while thinner yarn will make a smaller one. Adjust your hook size accordingly.
5. How do I attach the keyring securely?
Use a sturdy loop of yarn on top of the duck’s head and weave it several times before attaching the ring. This ensures strength and durability.
6. Is stuffing necessary?
Yes, a little stuffing gives the duck its adorable round shape. Be careful not to overfill to keep the stitches neat.
The Crochet Duck Keychain 🐥-Step by Step Tutorial is a delightful and easy project that combines creativity, simplicity, and charm.
You’ve learned how to gather materials, crochet each part, assemble your duck, and even personalize it with fun details. Whether for yourself or as a thoughtful handmade gift, this tiny duck will surely brighten anyone’s day.
Now that you know all the steps, why not give it a try? Crochet your own cute duck keychain and share your experience! Leave a sincere opinion and any suggestions you might have — your feedback helps inspire more creative projects for everyone who loves crochet. 🧶💛
