
Crochet Cowboy Hat Pattern

Crocheting is an incredibly versatile and relaxing craft, and creating a crochet jellyfish is one of the most delightful projects for anyone looking to add a bit of whimsical charm to their handmade items. In this crochet jellyfish tutorial, you will learn everything you need to know, from selecting the right materials to finishing off your jellyfish masterpiece. This step-by-step tutorial is designed to guide both beginners and experienced crocheters through each phase of the project, ensuring that by the end, you’ll have a unique, fun piece that you can proudly display or gift to someone special.
Whether you are new to crocheting or an expert, understanding the basics of crochet jellyfish crafting can open up an entire world of creative possibilities. Jellyfish are beautiful creatures, known for their delicate, flowing tentacles and translucent bodies, and recreating them in crochet adds a beautiful touch to any decor. In this guide, we will break down the entire process for you in simple, easy-to-follow instructions. By the end of this tutorial, you’ll have mastered the art of crocheting your own jellyfish, step by step.
Before we dive into the detailed instructions, it’s important to note that crochet jellyfish can be customized in many ways. From the size and color of the body to the number of tentacles, there is no limit to how you can personalize your creation. The key to making this project enjoyable is taking your time, experimenting with different yarns, and having fun with the process. In this tutorial, we’ll use some common materials and basic crochet stitches, so even if you’re a beginner, you won’t feel overwhelmed. Let’s get started with the basics of crochet jellyfish tutorial and discover how you can bring this marine-inspired creature to life.
Before you begin crocheting your jellyfish, it’s essential to gather all the necessary materials. Having everything on hand will help you avoid interruptions as you work through the steps of your crochet jellyfish tutorial. Here’s what you’ll need:
With these materials ready, you’re all set to begin crocheting your jellyfish. Now, let’s dive into the step-by-step process of creating your beautiful crochet jellyfish.
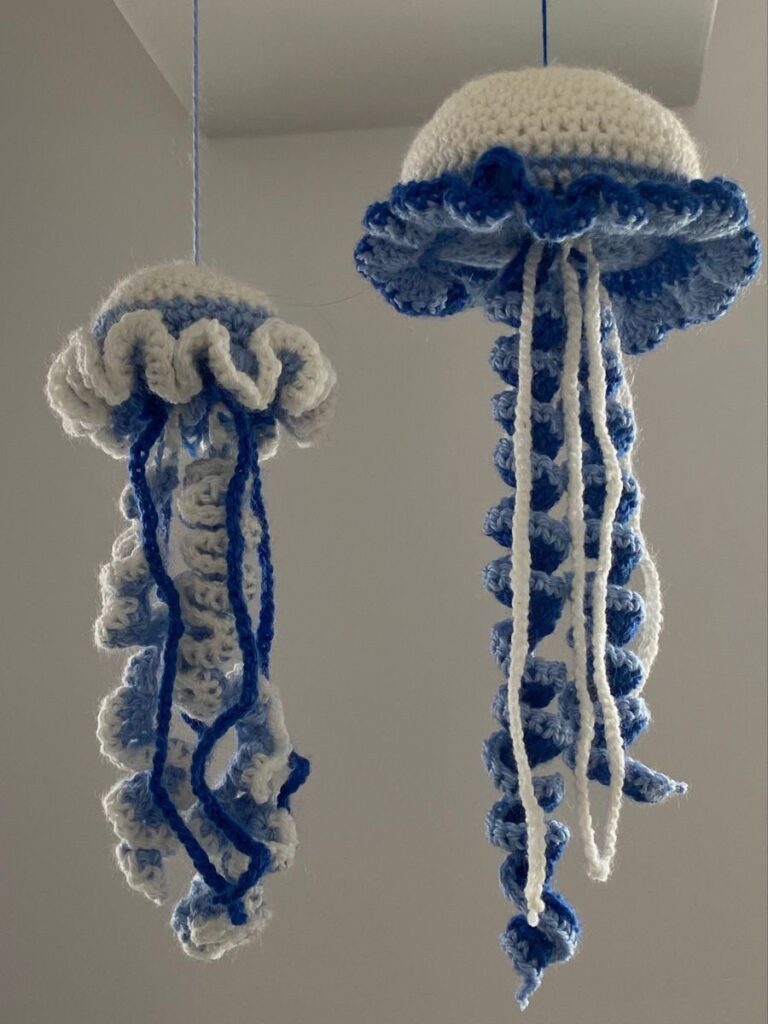
The first step in your crochet jellyfish tutorial is to create the body. The jellyfish’s body is typically bell-shaped, and it can be made using basic crochet stitches such as the chain stitch, slip stitch, and single crochet. Follow the steps below to start:
Continue increasing in this manner until you reach the desired size for the body of your jellyfish. You can stop increasing once you’re satisfied with the width of the bell.
Now that you’ve completed the base for the jellyfish’s bell, it’s time to start shaping it. To give the body more depth and make it resemble the soft, bell-like shape of a real jellyfish, follow these steps:
Once you’ve reached the desired shape and size, you can move on to the next step.
The jellyfish’s tentacles are what truly bring your creation to life. They’re typically long, flowing, and soft, so you want to make sure they match the look and feel you want for your crochet jellyfish tutorial. Here’s how to create them:
Once all your tentacles are attached, your jellyfish will have the signature look of its flowing appendages.
Now that you’ve made the body and tentacles, it’s time to add the finishing touches to your jellyfish. This will bring your creation to life and give it the soft, 3D shape that is characteristic of a real jellyfish.
Your crochet jellyfish is now complete!
1. What kind of yarn is best for crocheting a jellyfish?
A soft and lightweight yarn, such as cotton or acrylic, works best for crocheting jellyfish. It’s important to choose a yarn that’s easy to work with and gives the jellyfish a delicate, flowing look.
2. How long should I make the tentacles?
The length of the tentacles is entirely up to you. Some people prefer shorter tentacles, while others create long, flowing ones. Aim for at least 5-6 tentacles, each around 10-12 inches long.
3. Can I use other stitches for the jellyfish body?
Yes! While single crochet stitches are the most common for making the body of a jellyfish, you can experiment with other stitches, such as half double crochet or double crochet, to create different textures.
4. How can I make my jellyfish more colorful?
To add more color to your jellyfish, try using variegated yarn for the body or alternating different colors for each tentacle. You can also use multiple colors to create a striped or gradient effect.
5. Can I make a smaller jellyfish?
Yes, if you prefer smaller jellyfish, simply use a thinner yarn and smaller crochet hook. This will result in a more delicate, miniature version.
In this crochet jellyfish tutorial, we’ve covered the essential steps needed to create a beautiful and unique jellyfish.
From selecting the right yarn to adding those delicate tentacles, each part of the process has been designed to make it easy.
For you to follow and complete remember, crocheting is all about creativity, so feel free to experiment with colors


