
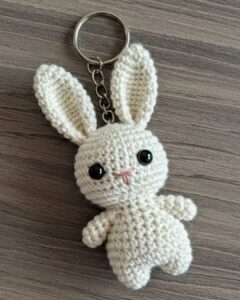
Cute crochet bunny tutorial

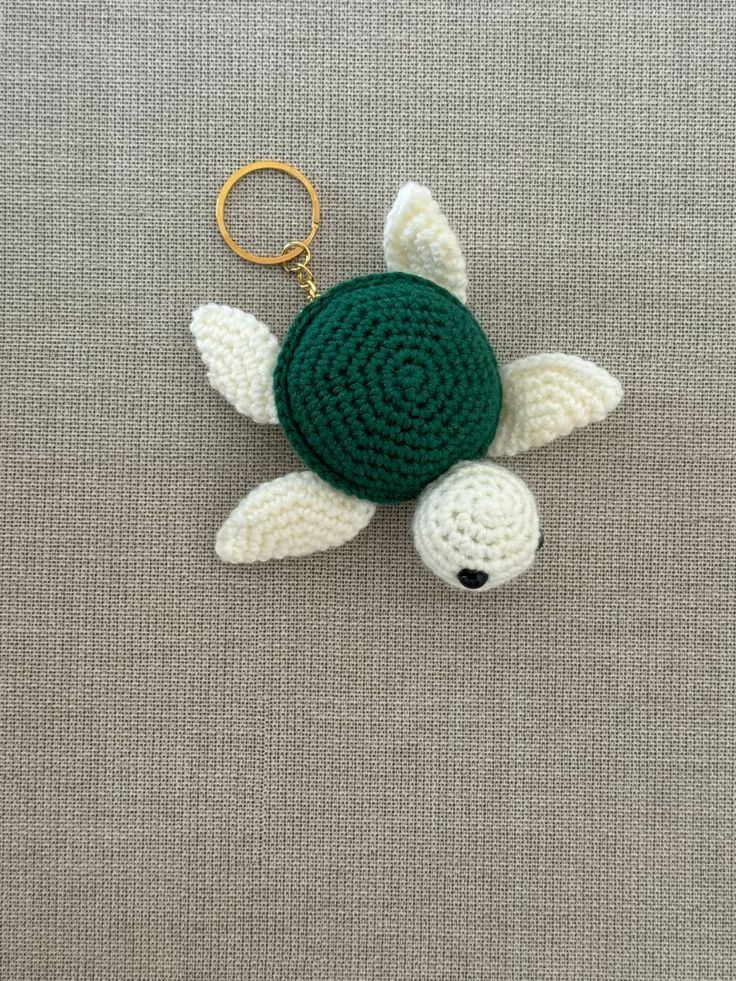
When it comes to crochet projects that combine charm, creativity, and a relaxing crafting experience, few things are as delightful as making an Amigurumi turtle – Step by Step Tutorial. This project is perfect for both beginners and experienced crocheters because it allows you to practice basic stitches while creating a toy that is both cute and practical. By following this tutorial, you can create a beautiful amigurumi turtle that can be used as a decoration, a toy, or even a thoughtful handmade gift for loved ones.
One of the best things about this Amigurumi turtle – Step by Step Tutorial is how it encourages crafters to slow down and enjoy the process. Crochet itself has a calming effect, and making amigurumi animals adds a sense of purpose and fun. Each stitch brings the turtle to life, from its little round shell to its tiny feet and smiling face. As you progress, you’ll see how simple techniques can transform yarn into something magical, which makes this project extra rewarding.
Another benefit of learning through an Amigurumi turtle – Step by Step Tutorial is that it opens the door to endless creativity. Once you learn the basics, you can experiment with different yarn colors, add unique embellishments, or even adjust the size to make a family of turtles in varying shapes. Whether you’re crafting for yourself, your kids, or as a gift, this project will surely bring smiles to everyone who sees it.
To begin your Amigurumi turtle – Step by Step Tutorial, it is essential to gather the right materials and tools. Having everything prepared before you start will make the process smooth and enjoyable. The first thing you’ll need is yarn, and for beginners, medium-weight cotton or acrylic yarn works best. Cotton yarn provides a firm stitch that is ideal for amigurumi, while acrylic is soft and versatile.
You will also need a crochet hook that matches the size recommended for your yarn. Typically, a 3.0mm to 4.0mm hook works well for amigurumi projects. The smaller hook size helps create tight stitches that prevent stuffing from showing through. Make sure to test your tension and adjust if needed so your turtle has a neat appearance.
Stuffing material is another essential supply for this project. Polyester fiberfill is the most commonly used, as it is lightweight and easy to work with. You’ll need enough stuffing to shape the turtle’s head, body, legs, and shell without overfilling, which could stretch the stitches. A yarn needle is also required for sewing the pieces together securely.
In addition to the basics, you may want to use safety eyes to give your amigurumi turtle a lively and playful expression. These are plastic eyes that snap in place and are safe for toys. Alternatively, you can embroider the eyes using black yarn or thread for a softer, baby-friendly option. Choosing the right finishing touches helps personalize your turtle.
You might also find it helpful to have stitch markers on hand, especially if you are new to amigurumi. These little tools help you keep track of rounds, ensuring accuracy throughout the project. Scissors will be needed to cut your yarn, and it’s always a good idea to keep them nearby as you work.
Once you have gathered these tools and materials, you’re ready to begin the exciting process of crocheting your turtle. Preparing in advance makes the crafting experience more enjoyable, and you’ll be able to focus on the fun of bringing your amigurumi turtle to life.
Now that you have your supplies ready, let’s dive into the actual process of this Amigurumi turtle – Step by Step Tutorial. The project is typically broken down into parts: the head, the shell, the body, the legs, and the final assembly. Each part is simple and manageable, especially when tackled one step at a time.
Start with the turtle’s head by making a magic ring and working single crochet stitches in the round. Increase gradually until you achieve the size you want for the head, then continue crocheting in rounds without increases to give it shape. Before finishing, lightly stuff the head with fiberfill to ensure it stays round and firm.
Next, create the turtle’s shell, which is the most distinctive feature. Using a color of your choice, begin with a magic ring and increase with single crochet stitches until you form a flat circle. Once it reaches the desired diameter, continue working without increases to give the shell depth. You can change colors or add stripes for a creative touch.
The turtle’s body is similar in construction to the shell but slightly smaller. Start with a circle and crochet in rounds until you reach the right size. Stuff the body firmly, then set it aside for assembly. The shell and body will later be joined together to complete the turtle’s torso.
For the legs and tail, crochet small oval shapes using single crochet stitches. These parts are quick and fun to make, and they add character to your turtle. Stuff them lightly to keep them soft and flexible, which will give your finished turtle a realistic yet adorable look.
Once all the parts are crocheted, it’s time to assemble your amigurumi turtle. Use a yarn needle to carefully sew the head, legs, and tail onto the body. Then attach the shell on top, making sure it is centered. Finally, add the eyes and embroider a mouth to give your turtle personality. With these steps, your turtle is complete.
One of the joys of following an Amigurumi turtle – Step by Step Tutorial is that you can customize your project in many creative ways. For instance, you can experiment with different yarn colors to make your turtle truly unique. Traditional shades of green and brown look natural, but pastel tones or even rainbow colors add a playful twist.
You can also adjust the size of your turtle by changing the hook size or yarn weight. Using thicker yarn and a larger hook will produce a bigger turtle, while thinner yarn and a smaller hook create a miniature version. This flexibility allows you to create a whole family of turtles in varying sizes.
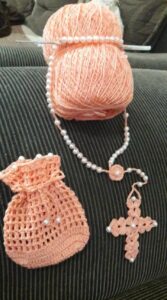
Adding embellishments is another fun way to personalize your turtle. Consider stitching little flowers onto the shell, adding beads, or even crocheting accessories like a tiny hat or scarf. These extra details give your amigurumi turtle more personality and charm.
If you are making the turtle as a gift for a child, think about safety and durability. Opt for embroidered eyes instead of safety eyes, and ensure all pieces are sewn tightly to withstand play. Handmade toys like this often become cherished keepsakes when they are made with care.
Another customization option is experimenting with textures. Try using variegated yarn for a patterned shell or mixing yarn types to achieve a special effect. This is an excellent way to practice creativity while staying within the framework of the tutorial.
Finally, remember that practice makes perfect. Your first amigurumi turtle may not look exactly how you imagined, but with each project, your skills will improve. Don’t be afraid to try new techniques and let your creativity shine through in every turtle you make.
When working on an Amigurumi turtle – Step by Step Tutorial, beginners often face some common challenges. One frequent mistake is crocheting too loosely, which causes gaps in the fabric where the stuffing can peek through. To avoid this, use a smaller hook and maintain consistent tension throughout your stitches.
Another common error is overstuffing or understuffing the parts of the turtle. Too much stuffing can stretch the stitches, while too little will make the turtle floppy. The key is to add stuffing gradually and evenly until the shape is firm but not overstretched.
Sometimes, beginners struggle with keeping track of rounds. Losing count can lead to uneven shaping or incorrect stitch numbers. Using a stitch marker at the start of each round helps you stay on track and ensures accuracy. This simple habit makes the process smoother.
Misalignment during assembly is another issue crafters encounter. If the head or legs are sewn on unevenly, the turtle may look lopsided. To prevent this, pin the pieces in place before sewing and check their positioning. Taking the extra time to align the parts leads to a more polished final product.
Another challenge is choosing the wrong yarn or hook size. If the yarn is too thin or the hook too large, the turtle may not hold its shape well. Always follow the recommended sizes for amigurumi, and test your gauge before starting the project.
Finally, patience is key. Rushing through the steps can result in mistakes and frustration. Take your time, enjoy each stage, and remember that crocheting is as much about the process as it is about the finished turtle.
Q1: How long does it take to make an amigurumi turtle?
The time varies depending on your skill level, but most crafters complete a small turtle in 4–6 hours. Larger or more detailed versions may take longer.
Q2: What is the best yarn for making an amigurumi turtle?
Cotton yarn is highly recommended because it creates firm stitches that hold shape well. Acrylic yarn is also a good choice, especially for soft and colorful designs.
Q3: Can beginners make an amigurumi turtle?
Yes! The Amigurumi turtle – Step by Step Tutorial is beginner-friendly, as it mostly uses single crochet stitches and basic techniques.
Q4: How can I make my amigurumi turtle safe for children?
Use embroidered eyes instead of safety eyes and ensure all parts are sewn securely. Avoid small detachable embellishments that could pose a choking hazard.
Q5: Can I resize the turtle?
Absolutely. You can make larger or smaller turtles by adjusting your yarn weight and hook size. This flexibility allows you to create turtles of all sizes.
Q6: What if my turtle looks uneven or lopsided?
Check that your stitches are consistent and that all parts are aligned correctly during assembly. Pinning pieces in place before sewing can help achieve a balanced look.
Creating an Amigurumi turtle – Step by Step Tutorial is a rewarding project that combines creativity, skill, and relaxation. From gathering the materials to assembling the final details, every step is an opportunity to enjoy the art of crochet while crafting something adorable and unique.
The ability to customize, practice, and experiment makes this project enjoyable for beginners and experts alike.
By following this guide, you’ve learned the essential steps, common mistakes to avoid, and creative ways to personalize your turtle. Now it’s your turn to bring this little creature to life with your hands and imagination. I’d love to know what you think—please leave your honest opinion and share your suggestions. Your feedback will inspire even more creativity for future projects!

