
Crochet Cowboy Hat Pattern

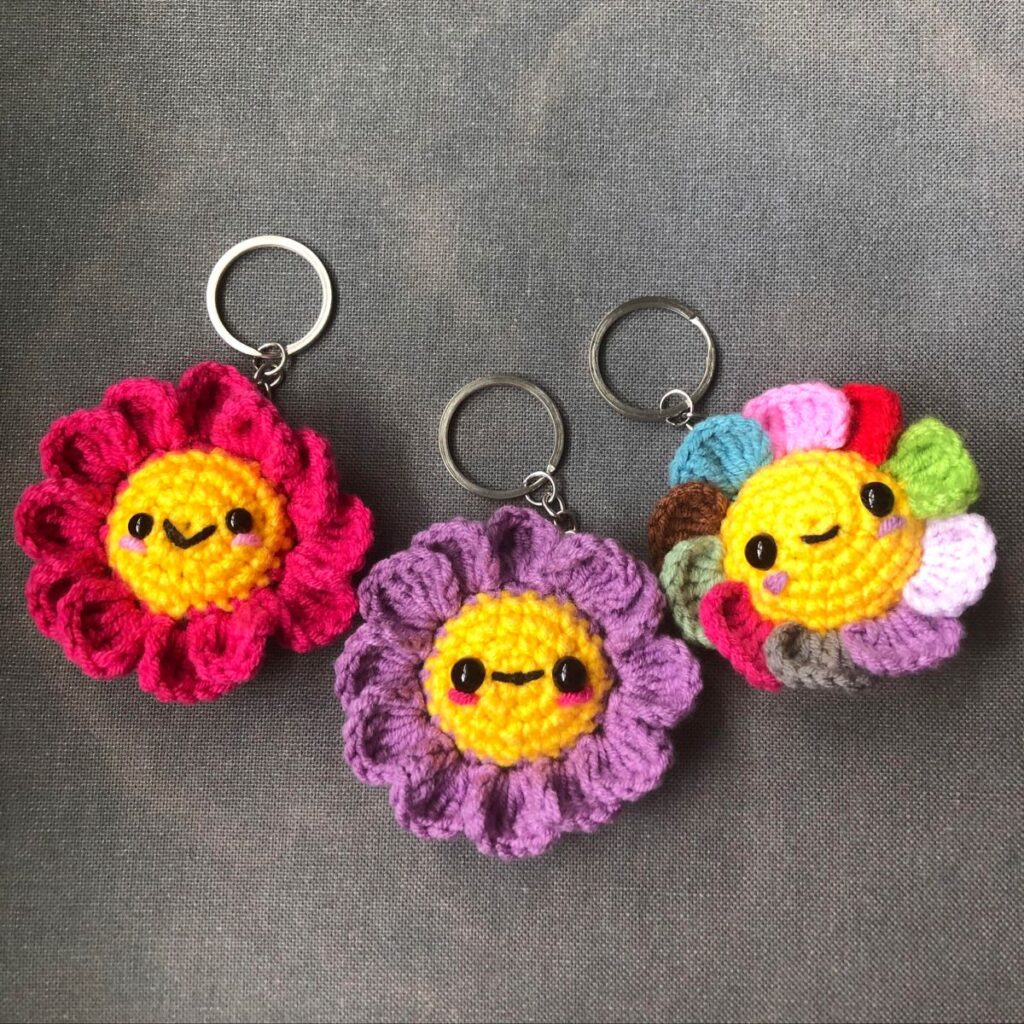
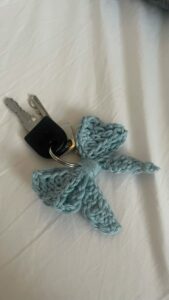
Creating a crochet flower-shaped keychain – Step by Step Tutorial is a delightful way to combine creativity and practicality. This small yet charming project is perfect for both beginner and experienced crocheters, offering a chance to craft something beautiful that can also be used every day. Whether you want to make one for yourself, as a gift for a loved one, or even to sell at craft fairs, this crochet flower-shaped keychain – Step by Step Tutorial will guide you through each stage of the process. The best part? It requires only a small amount of yarn, making it a cost-effective and enjoyable project.
A crochet flower-shaped keychain – Step by Step Tutorial is more than just a crafting guide; it’s an opportunity to express your personality through colors, shapes, and textures. Since the project is small, you can finish it quickly, making it an excellent choice for those who enjoy instant gratification in their crafting. Plus, the flower shape adds a touch of charm that makes it stand out from regular keychains. This tutorial will cover everything from choosing materials to adding finishing touches, ensuring you have all the knowledge you need to create a polished, durable keychain.
By making your own crochet keychain, you can match it with your bag, car keys, or even seasonal themes. The crochet flower-shaped keychain – Step by Step Tutorial we’ll go through today will help you understand not only the basic crochet stitches but also how to assemble and finish the project so that it lasts a long time. You’ll also learn tips to customize it, so no two keychains have to look alike. Now, let’s dive into the materials and preparation needed for this fun and creative craft.
To begin your crochet flower-shaped keychain – Step by Step Tutorial, you’ll first need to gather the right materials. Choosing high-quality supplies ensures your finished keychain will be sturdy and attractive. A small amount of cotton yarn is ideal because it’s durable, holds its shape well, and comes in vibrant colors. You can choose one solid color or mix two or three shades to give your flower a unique, eye-catching look.
Next, you will need a crochet hook that matches the yarn weight. For most cotton yarns, a 2.5mm to 3.5mm hook works perfectly. Using the correct hook size ensures your stitches are tight and consistent, which is especially important for small projects like this keychain.
You’ll also need a metal keychain ring or clasp. These can be found in craft stores or online, and they come in various sizes and finishes. A silver or gold ring works well with most color combinations, but you can also choose fun, colorful rings for a playful vibe.
A yarn needle is another essential tool for this project. It will help you weave in ends neatly and attach the flower securely to the keychain ring. Scissors will also be necessary for cutting yarn cleanly.
If you want to add extra flair to your project, consider embellishments like beads, sequins, or buttons. These can be sewn onto the flower’s center to give it more texture and sparkle.
Once you have all your materials ready, you’ll be prepared to follow each step of this crochet flower-shaped keychain – Step by Step Tutorial with ease and confidence.
The first step in the crochet flower-shaped keychain – Step by Step Tutorial is to make the flower itself. Start with a slip knot and chain four stitches. Join the last chain to the first with a slip stitch to form a small ring. This will be the center of your flower.
For the first round, chain three (which counts as your first double crochet), then make 11 more double crochets into the center of the ring. You should have 12 stitches total. Join with a slip stitch to the top of the starting chain three.
Now, it’s time to create the petals. In the first stitch, make one single crochet, one half double crochet, two double crochets, one half double crochet, and one single crochet. Repeat this sequence in each stitch around to form six petals in total.
After finishing all the petals, slip stitch into the base of the first petal to secure your work. You can fasten off the yarn here, leaving a long tail if you want to use it to attach the flower to the keychain later.
For a fuller look, you can crochet a second flower of the same size and sew the two together, back-to-back. This will make your keychain look more substantial and polished from all angles.
This part of the crochet flower-shaped keychain – Step by Step Tutorial is where you can get creative by using different stitch patterns or varying the number of petals to achieve a unique look.
With your crochet flower complete, the next step in the crochet flower-shaped keychain – Step by Step Tutorial is to attach it to the keychain hardware. Thread your yarn needle with the long tail you left when finishing the flower.
Pass the needle through the loop of the keychain ring and then sew it securely to the top of your flower. Be sure to make several passes to ensure the connection is strong enough to handle daily use.
If you prefer, you can create a small crocheted chain loop instead of sewing the flower directly to the ring. This loop can be made by chaining 10–15 stitches, joining it to form a small circle, and then sewing it to the flower. This method adds a bit of length and movement to the keychain.
You can also add a small bead or button at the flower’s center at this stage. Simply sew it in place using the yarn needle, making sure it’s firmly attached.
Once everything is attached, weave in any loose ends neatly on the back of the flower, then trim excess yarn with scissors. Your crochet flower-shaped keychain – Step by Step Tutorial project is now almost complete.
This step is essential for ensuring your keychain not only looks beautiful but is also functional and durable for everyday use.
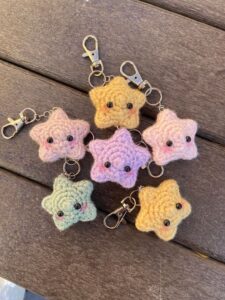
The beauty of the crochet flower-shaped keychain – Step by Step Tutorial is that it can be easily customized. You can make flowers in various colors to match different seasons or occasions. For example, pastel shades work well for spring, while bold reds and greens can create a festive holiday look.
You can also experiment with different yarn textures. While cotton is the most durable, acrylic or blended yarns can give a softer or shinier finish to your keychain. Just be aware that softer yarns may not hold their shape as well over time.
Adding multiple layers of petals can create a more intricate and detailed flower design. This gives your keychain a unique, handcrafted appeal that stands out from mass-produced items.
To care for your crochet keychain, avoid getting it excessively wet, as moisture can cause the yarn to stretch or lose its shape. If it does get dirty, gently hand wash it in cool water with mild soap, then air dry.
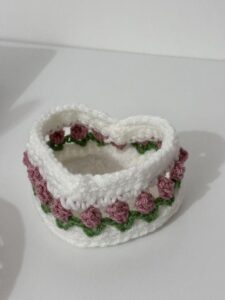
If you plan to sell these keychains, consider packaging them in small gift bags or boxes for a professional presentation. A well-presented handmade item can make a great impression and add value to your work.
With these customization and care tips, your crochet flower-shaped keychain – Step by Step Tutorial can become a signature accessory or a thoughtful handmade gift for friends and family.
Q: Is this project suitable for beginners?
A: Yes, the crochet flower-shaped keychain – Step by Step Tutorial uses basic stitches that beginners can master quickly.
Q: How long does it take to make one keychain?
A: Typically, it takes less than an hour, making it a great quick project.
Q: Can I use leftover yarn for this project?
A: Absolutely! This project is perfect for using up small scraps of yarn.
Q: What size crochet hook is best?
A: A 2.5mm to 3.5mm hook works well for most cotton yarns.
Q: How do I make the flower more durable?
A: Use tight stitches, sturdy yarn, and ensure the attachment to the keyring is reinforced.
Q: Can I make different flower shapes?
A: Yes, you can modify petal patterns or stitch types to create unique designs.
In this crochet flower-shaped keychain – Step by Step Tutorial, we covered everything from choosing materials and crocheting the flower to attaching it to a keychain and customizing the final product. This small but charming project is quick to make, beginner-friendly, and endlessly adaptable.
Whether you’re crafting for personal use, as gifts, or for sale, this tutorial provides all the steps needed to create a high-quality, handmade accessory.
Now it’s your turn—grab your hook, yarn, and creativity, and give it a try! We’d love to hear your honest opinion and suggestions about this tutorial so we can continue creating helpful and inspiring guides.


