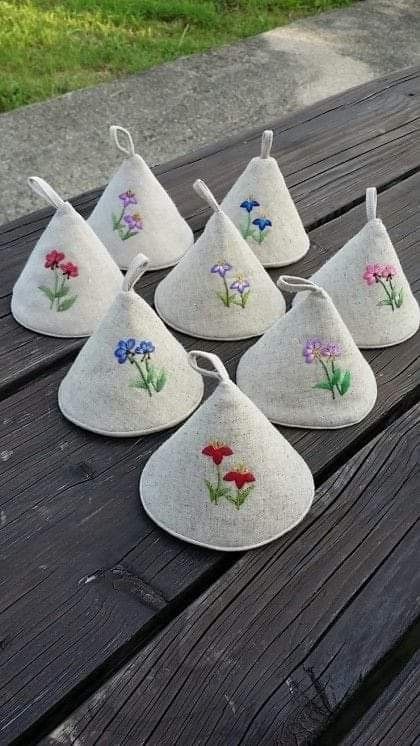
Tutorial for making your own triangular fabric trivet

Pinwheel Quilt Block-Step by Step Tutorial is one of the most beloved and timeless quilt block techniques in the world of patchwork and quilting. Known for its movement, symmetry, and versatility, the Pinwheel Quilt Block-Step by Step Tutorial is ideal for beginners and experienced quilters alike. On the very first line, this article begins with the main keyword as requested, and throughout the text, you will see how this guide can help you master every detail of this classic pattern. If you love fabric crafts, geometric designs, and creating quilts with personality, this block is an excellent place to begin.
The Pinwheel Quilt Block-Step by Step Tutorial teaches you how simple half-square triangles can turn into dynamic shapes that bring quilts to life. The design resembles a spinning windmill, giving any quilt a sense of movement and charm. It works well in baby quilts, holiday quilts, table runners, wall hangings, and full-size bed quilts. Before diving into the detailed instructions, this introduction will help you understand why so many quilters consider the pinwheel block an essential pattern in their quilting journey.
This pattern allows you to experiment with contrasting colors, play with value changes, and create eye-catching layouts with very little fabric. The Pinwheel Quilt Block-Step by Step Tutorial emphasizes precision, but also encourages creativity. As long as you follow the basics, your blocks will come out beautifully balanced and ready for countless quilt projects. Now let’s explore the materials, techniques, and tips that will help you get the most beautiful results possible.
The first step in mastering the Pinwheel Quilt Block-Step by Step Tutorial is understanding the essential components of the block. At its core, the pinwheel design is created using four half-square triangles arranged in a spinning formation. These simple units offer endless possibilities and help quilters learn precision cutting and stitching techniques.
Half-square triangles, commonly known as HSTs, are one of the fundamental building blocks of quilting. In this Pinwheel Quilt Block-Step by Step Tutorial, they help create the iconic spinning effect that defines the pinwheel block. Each triangle must be cut and sewn accurately to ensure that points align correctly when assembled.
Choosing fabrics with strong contrast improves the visual impact of the pinwheel design. Colors such as white and navy, red and cream, or bold prints paired with solids work beautifully. The clean separation between the fabrics makes the movement of the pinwheel stand out more clearly.
Accurate cutting is one of the most important skills you will develop while following this step by step tutorial. Using a rotary cutter, ruler, and quilting mat helps you achieve precise pieces that will assemble smoothly. Quilters often say, “Measure twice, cut once,” and this is especially true with HST-based blocks.
Stitching your triangles together requires a consistent seam allowance, typically a quarter inch. Maintaining this seam width ensures that your finished block measures correctly and fits well when joined with other quilt blocks. Precision here will make your overall project look more professional.
Once sewn, the triangles should be pressed carefully to reduce bulk and keep seams flat. Proper pressing improves the visual appeal and helps the block maintain a crisp, finished look. The next part of the Pinwheel Quilt Block-Step by Step Tutorial will guide you through making these units.
To begin this section of the Pinwheel Quilt Block-Step by Step Tutorial, you will need two contrasting squares of fabric. When placed right sides together, these squares form the basis for two half-square triangles. This two-for-one method is efficient and ideal for beginners.
Start by drawing a diagonal line from one corner to the opposite corner on the back of one square. This line will serve as your guide. Then draw two additional lines, each one quarter inch away from the center line. These sewing lines help you produce perfectly sized HSTs.
Once your lines are drawn, sew along the two outer lines. This technique, explained clearly in the Pinwheel Quilt Block-Step by Step Tutorial, ensures accuracy and helps you stay consistent with your seam allowance. After stitching, simply cut along the center drawn line using your rotary cutter.
Open each triangle unit and press the seam to one side, typically toward the darker fabric. This enhances contrast and keeps the block looking clean. Pressing is an essential step that many beginners underestimate, but it makes a significant difference in the final appearance.
Next, square up your half-square triangles. This means trimming each one so that all edges are even and each unit reaches the exact measurement needed. Squaring up helps every piece fit perfectly when assembling the full block.
With all your HSTs prepared, you are now ready to move on to arranging and sewing the pieces together. The next stage of the Pinwheel Quilt Block-Step by Step Tutorial will show you how to form the pinwheel shape.
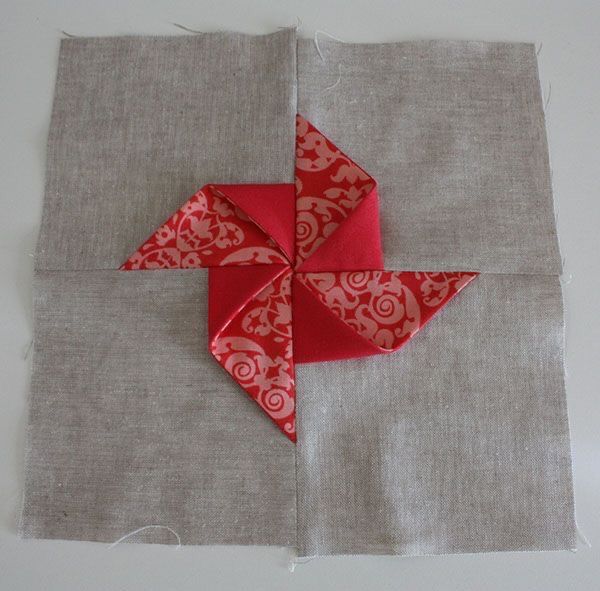
Now that you have created your half-square triangles, you can begin assembling the main design of the Pinwheel Quilt Block-Step by Step Tutorial. Lay out your four HSTs on a flat surface to visualize how the block will look before stitching. Arrange them so that they form the spinning pinwheel pattern.
When positioning your pieces, ensure the darker fabrics create a consistent rotating direction. The movement of the block relies heavily on the correct placement of triangles. This small detail makes the pinwheel design clear and visually appealing.
Once arranged, sew the triangles together in pairs. Each pair will form a larger triangle. Maintaining your quarter-inch seam allowance in this step is important to keep all points sharp and aligned. Taking your time will help avoid mistakes.
Press the seams of each pair in opposite directions. Doing so allows the seams to “nest” together when joining the pairs, creating clean intersections. Nesting seams is one of the helpful techniques you will practice throughout this Pinwheel Quilt Block-Step by Step Tutorial.
Next, join the two larger triangles to complete the full pinwheel block. Align the center seam carefully so the points meet beautifully in the center. This attention to detail gives your block a polished, professional finish.
Finally, press the entire block again and check the measurements to ensure accuracy. Now your pinwheel block is ready to be included in your next quilt project.
Throughout the Pinwheel Quilt Block-Step by Step Tutorial, achieving crisp points is one of the biggest goals for quilters. To do this, always square up your HSTs before assembling the block. This step ensures that all pieces match in size.
Consistent seam allowance is also critical. Using a quarter-inch presser foot on your sewing machine can help you maintain an even seam throughout the block. Precision prevents gaps or overlapping points in the finished design.
Another helpful tip is to avoid over-pressing. While pressing is important, applying too much pressure can stretch the fabric and distort your block. Use gentle, upward pressing motions to keep your pieces flat and accurate.
Pinning your triangles before stitching helps keep everything aligned. Place pins at the points where seams should match to avoid shifting while sewing. This ensures the pinwheel shape remains crisp and symmetrical.
If you notice any slight unevenness, trimming the block slightly can help refine the edges. This step improves overall block accuracy, especially when joining multiple blocks in a quilt.
Taking your time is essential. Quilting is a creative and relaxing process, and rushing can lead to mistakes. Enjoy the steps and celebrate each improvement as you practice the techniques in this tutorial.
1. Is the pinwheel quilt block good for beginners?
Yes, the Pinwheel Quilt Block-Step by Step Tutorial is beginner-friendly and introduces essential quilting skills.
2. What fabrics work best for the pinwheel block?
Cotton fabrics with good contrast create eye-catching pinwheel designs.
3. Do I need special tools?
Basic quilting tools such as a ruler, rotary cutter, and sewing machine are enough.
4. Why are half-square triangles important?
They form the main structure of the pinwheel block and create the spinning effect.
5. How do I keep my points sharp?
Accurate cutting, consistent seam allowances, and careful pressing help maintain crisp points.
6. Can I use prints instead of solids?
Yes, prints work beautifully as long as they contrast well with the background fabrics.
In this complete Pinwheel Quilt Block-Step by Step Tutorial, you learned how to prepare materials, create half-square triangles, assemble the block, and finish it with professional-quality details.
This classic design is versatile, charming, and ideal for a wide variety of quilt projects. I hope you feel inspired.
To create your own pinwheel blocks and explore new quilting techniques. Please leave a sincere opinion and share any suggestions—I would love to hear your thoughts!


