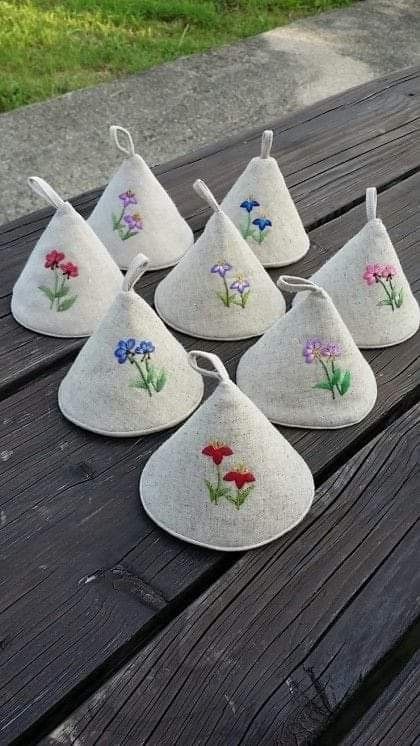
Tutorial for making your own triangular fabric trivet

Learning how to make a Fabric storage basket- Step by Step Tutorial is an excellent way to create practical and stylish organization solutions for your home. With just a few pieces of fabric and some basic sewing skills, you can create a functional basket that helps you keep things neat while adding a touch of handmade charm to your décor. This project is perfect for beginners because it requires simple techniques, and the result is both useful and beautiful.
The great thing about this Fabric storage basket- Step by Step Tutorial is its versatility. You can use the basket to store toys, sewing supplies, magazines, or even bathroom essentials. By choosing fabrics in different patterns and colors, you can customize the look to fit your home’s style perfectly. It is also a sustainable alternative to plastic storage boxes since you can reuse fabric scraps or repurpose old textiles.
In this guide, we will explain in detail how to make a Fabric storage basket- Step by Step Tutorial, including all the materials you need, instructions for sewing, decoration ideas, and tips for beginners. We will also answer common questions at the end to make sure you have all the information necessary for a successful project.
Before starting the Fabric storage basket- Step by Step Tutorial, it is essential to gather the right materials. You will need fabric for the outer layer, fabric for the lining, interfacing or batting for stability, matching thread, scissors, sewing pins, and a sewing machine or needle for hand sewing.
The outer fabric should be sturdy enough to help the basket hold its shape. Canvas, denim, or upholstery fabric works well because they provide durability and structure. For the lining, you can choose cotton or any soft fabric since it will be on the inside.
Interfacing or batting adds stiffness to the basket so it can stand upright. Fusible interfacing, which can be ironed onto the fabric, is especially convenient for this purpose. It helps your basket keep its shape even when empty.
Thread color can either match your fabric for a seamless look or contrast with it for a decorative effect. Sewing pins are useful for holding everything in place while you work, especially when aligning corners and edges.
Having a rotary cutter or fabric scissors is also helpful for making clean, straight cuts. If you plan to make several baskets, investing in a cutting mat and ruler will make the process easier and more precise.
Lastly, prepare your sewing machine with the correct needle for heavy fabrics, or get a strong hand-sewing needle if you prefer to sew manually. Being organized before you begin the Fabric storage basket- Step by Step Tutorial will make the entire process smoother and more enjoyable.
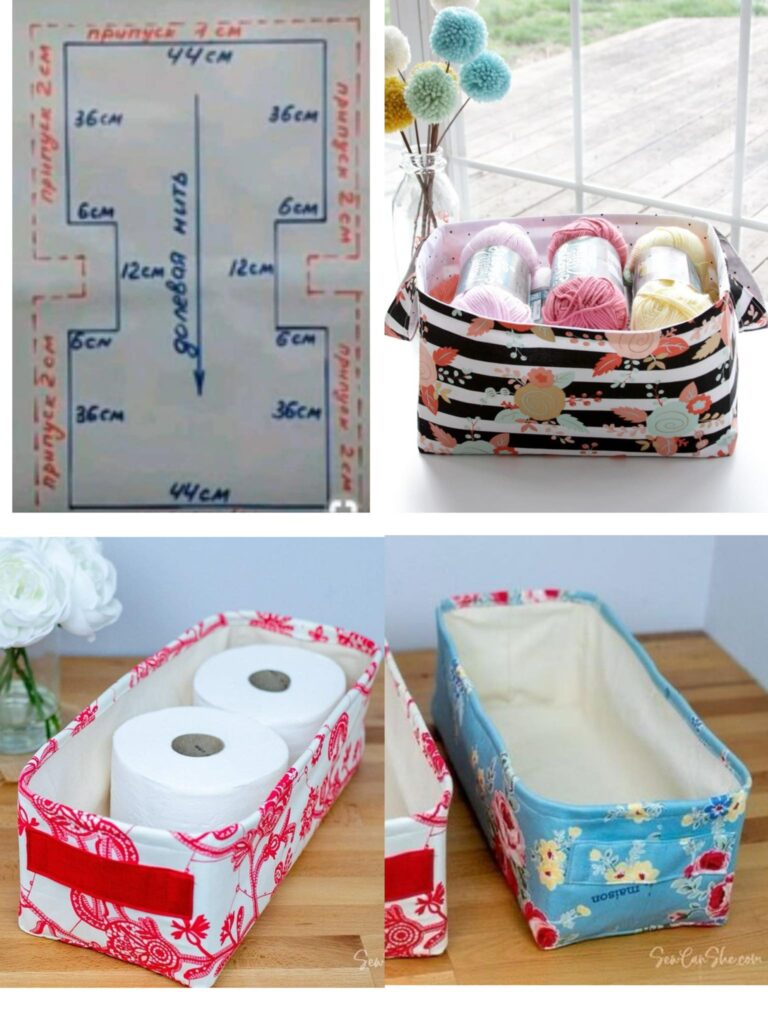
The first step in the Fabric storage basket- Step by Step Tutorial is cutting the fabric. You will need two rectangles of the same size—one for the outer fabric and one for the lining—as well as interfacing cut to the same dimensions. A common size for a medium basket is 16 inches wide by 20 inches tall, but you can adjust depending on your needs.
Next, iron the interfacing onto the back of the outer fabric according to the manufacturer’s instructions. This gives the basket strength and stability. If you are using batting instead of interfacing, layer it between the outer fabric and lining later on.
Place the outer fabric and lining right sides together, then sew along the top edge with a half-inch seam allowance. After sewing, flip the fabrics so the right sides are facing out, and press the top seam flat with an iron for a clean finish.
Now fold the entire piece in half, with the lining facing out, so that the side edges meet. Sew along the two side seams and the bottom edge, leaving a small opening in the lining for turning later.
To create a flat bottom for your Fabric storage basket- Step by Step Tutorial, pinch each bottom corner so that the side seam lines up with the bottom seam, forming a triangle. Measure about three inches from the corner tip and sew straight across. Repeat for the other corner.
Finally, turn the basket right side out through the opening in the lining, stitch the opening closed, and push the lining inside the outer fabric. Press the edges neatly, and your fabric storage basket is ready to use.
One of the best things about following a Fabric storage basket- Step by Step Tutorial is that you can customize your project in endless ways. The choice of fabric alone can completely change the look and purpose of the basket.
For example, if you want a decorative basket for the living room, choose fabrics with bold prints or trendy patterns. For a child’s room, fun colors and cartoon-themed fabrics work well. Neutral tones like beige, gray, or white make stylish storage options for bathrooms or bedrooms.
You can also add handles to your basket by sewing fabric strips or using leather straps on the sides. Handles make the basket easy to carry and add a professional touch to the design.
Adding pockets inside or outside the basket is another great idea. Small pockets can help organize smaller items like craft supplies or cosmetics, keeping everything easy to find.
If you want to make your basket washable, choose machine-friendly fabrics like cotton and avoid delicate embellishments. This makes it practical for laundry rooms or kitchens where frequent cleaning might be needed.
For a personal touch, consider using appliqué, embroidery, or even fabric paint to decorate the outside of your basket. Simple monograms or decorative stitching can turn a basic basket into a thoughtful handmade gift.
For beginners, making a Fabric storage basket- Step by Step Tutorial can seem challenging at first, but there are simple ways to make the process smoother. Always start by measuring and cutting your fabric accurately because uneven pieces can cause difficulties when sewing the seams.
Pinning or clipping the fabric layers together before sewing helps keep everything aligned. Skipping this step often leads to uneven edges or corners that do not match up correctly.
Another important tip is to use the correct stitch length. A medium-length straight stitch works best for sewing seams on heavier fabrics. Too short a stitch can make the fabric pucker, while too long a stitch may not hold securely.
Do not forget to reinforce the corners and handles by sewing back and forth a few times. These areas receive the most stress and need extra strength to prevent tearing over time.
Pressing your seams with an iron after each step gives the basket a neater and more professional finish. Many beginners skip this step, but it makes a big difference in the final result.
Finally, take your time and practice on scrap fabric if needed. Mistakes are part of the learning process, and each project helps you build confidence and improve your sewing skills.
Q1: Is the Fabric storage basket- Step by Step Tutorial beginner-friendly?
Yes, it is perfect for beginners because it uses simple sewing techniques and basic materials.
Q2: Can I make the basket without a sewing machine?
Yes, you can sew it by hand using strong stitches, but a sewing machine will make the process faster and easier.
Q3: What size fabric should I use for a small basket?
For a small basket, try starting with a 10 by 14-inch rectangle, then adjust based on the height and width you prefer.
Q4: How do I make the basket stand up on its own?
Using stiff interfacing or adding a second layer of fabric with batting will help the basket keep its shape.
Q5: Can I wash the fabric basket after making it?
Yes, if you use washable fabrics like cotton or canvas, you can clean it easily in the washing machine.
Q6: How can I add a lid to the basket?
You can cut an extra fabric circle or rectangle for the top, attach it with a zipper or Velcro, and line it for stability.
Making a Fabric storage basket- Step by Step Tutorial is a simple, creative, and rewarding sewing project. We covered the materials you need, the step-by-step sewing instructions, customization options, helpful tips for beginners, and answers to common questions.
Now it’s your turn to try making your own basket! Share your honest opinion about this tutorial and let us know your suggestions for future projects.
We would love to hear how your handmade storage basket turned out and what creative touches you added to make it unique.


