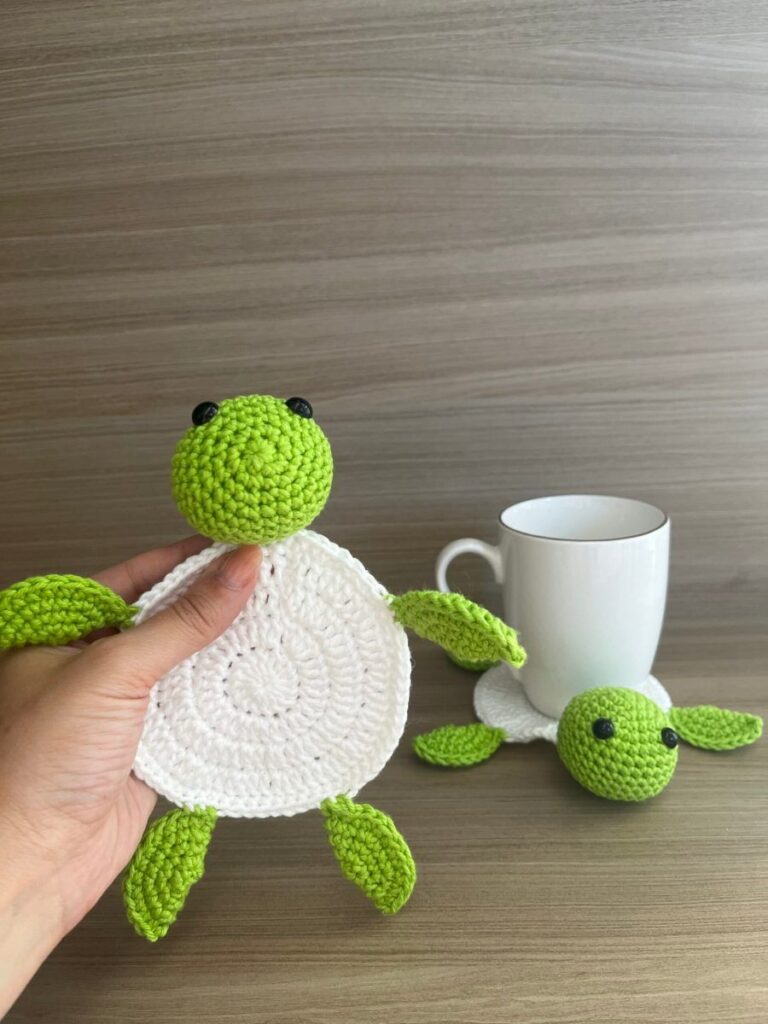
Crocheted turtle coaster pattern

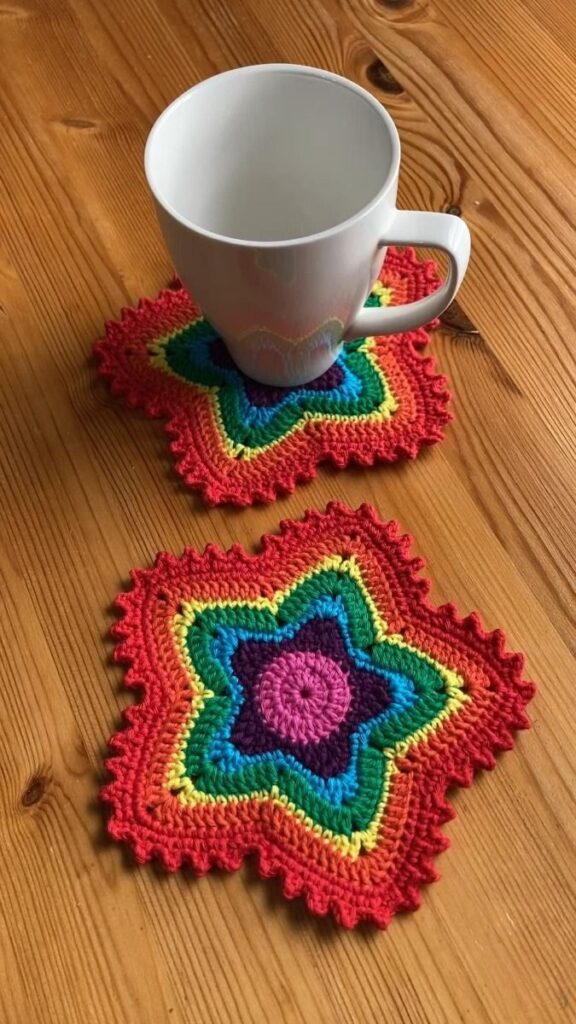
Rainbow Star Crochet Coaster Pattern-Step by Step Tutorial is a fun and colorful project perfect for crocheters of all levels who want to create unique and eye-catching pieces for home décor. This pattern allows you to play with vibrant shades and charming shapes, making it a wonderful option for gifts, table sets, or craft fairs. By following the Rainbow Star Crochet Coaster Pattern-Step by Step Tutorial, you will learn how to make a beautiful star-shaped coaster that is both functional and pretty. This article will guide you through the process with clarity, structure, and creativity, making your crafting experience enjoyable and successful.
Crocheting star-shaped coasters is an excellent way to practice shaping techniques while combining different colors in a harmonious way. When working with the Rainbow Star Crochet Coaster Pattern-Step by Step Tutorial, you will discover how simple stitches can turn into something extraordinary when arranged in a star design. The charming rainbow effect is created by switching colors at the right moments, resulting in a coaster that instantly brightens any space. With the right materials and instructions, even beginners can achieve a professional-looking result.
The beauty of the Rainbow Star Crochet Coaster Pattern-Step by Step Tutorial lies in its versatility. You can choose traditional rainbow colors, pastel shades, earthy tones, or any palette you prefer. The coaster works wonderfully as a decoration for coffee tables, dining tables, bedroom nightstands, or even as a gift tag accessory. Because it is lightweight, quick to make, and endlessly customizable, this pattern has become a favorite among crochet lovers. The next sections of this article will walk you through materials, steps, creative ideas, and essential tips to help you master this delightful project.
To follow the Rainbow Star Crochet Coaster Pattern-Step by Step Tutorial, the first step is gathering the right materials so your project flows smoothly. It is recommended to choose cotton yarn, as it provides good stitch definition, durability, and heat resistance, making it ideal for coasters. Cotton also helps the star maintain its shape, giving your finished piece a polished appearance that lasts.
You can select multiple yarn colors to achieve the traditional rainbow look or experiment with your own palette. Each round of the star can feature a different color, creating a bright, joyful pattern. If you prefer a softer aesthetic, pastel colors can create a delicate and dreamy rainbow effect. The colors you choose will determine the personality of your coaster, giving you complete creative freedom.
A matching hook size is also important. Typically, smaller hooks work best because they make the coaster firm, preventing it from curling or becoming too soft. Using the right hook ensures your stitches are tight, consistent, and stable. This helps maintain the shape of your star, especially when switching colors multiple times.
Scissors are essential for cutting the yarn neatly between color changes. Because this pattern involves several shades, you will need to trim and tie off ends frequently. A good pair of sharp scissors ensures clean cuts and minimizes fraying. This small detail contributes to the overall quality of your finished coaster.
A yarn needle is also necessary to weave in all the loose ends. Since you will be working with various colors, there will be multiple ends to secure. Taking the time to hide them neatly results in a professional-looking coaster that is strong and durable. This final step helps your stitches look seamless and polished.
Having all your materials ready before starting the Rainbow Star Crochet Coaster Pattern-Step by Step Tutorial will make your experience more enjoyable and efficient. Preparation helps you focus on the creative part without interruptions, allowing your project to come together beautifully.
To begin the Rainbow Star Crochet Coaster Pattern-Step by Step Tutorial, start by creating a magic ring or chaining a few stitches to form a small circle. This circle will serve as the center of your star and the base for the following rounds. Working in the round gives your coaster structure and symmetry, which is essential for achieving a beautiful star shape.
Once your center is ready, you will crochet the first round, usually consisting of basic stitches such as single crochet or half double crochet. These stitches form the foundation of the star and help stabilize the center. Keeping your tension consistent ensures that your coaster does not warp as you add more rounds. A stable center makes the following steps much easier.
The next step involves increasing stitches to prepare for star points. Increases allow the coaster to expand evenly, creating the circular shape that transitions smoothly into the star design. The Rainbow Star Crochet Coaster Pattern-Step by Step Tutorial guides you carefully through these increases so that your work stays balanced and symmetrical.
As you progress to the star points, you will begin forming the signature shape that makes this coaster special. Star points are usually created through a combination of chains and taller stitches such as double crochet or treble crochet. These stitches allow the points to extend outward while keeping the round structure stable. This step adds charm and dimension to your coaster.
Switching colors is what transforms your star into a rainbow. Each point or round can feature a different shade, creating a dynamic and cheerful effect. When changing colors, always secure your ends tightly to prevent unraveling. The Rainbow Star Crochet Coaster Pattern-Step by Step Tutorial encourages experimenting with color transitions, allowing you to create stunning variations.
Finally, after completing all rounds and star points, you will finish by weaving in the ends. This step ensures that your coaster stays neat and strong. Once you complete this process, you will have a vibrant and beautiful coaster that showcases your creativity and the techniques learned through the Rainbow Star Crochet Coaster Pattern-Step by Step Tutorial.
One of the best aspects of working with the Rainbow Star Crochet Coaster Pattern-Step by Step Tutorial is the opportunity to personalize your coaster in numerous ways. Changing the colors, yarn texture, or size allows you to create coasters that match your home décor or gifting preferences. Creativity is at the heart of this project, and the possibilities are endless.
If you prefer a softer visual effect, try using pastel yarns instead of traditional rainbow colors. This creates a gentle, soothing palette perfect for minimalist or romantic décor styles. The star shape remains the same, but the softer tones give your coaster a delicate charm. Pastel rainbow stars also make lovely gifts for birthdays, baby showers, or spring celebrations.
You can also create a monochrome star using different shades of the same color. This gradient effect adds depth and elegance while still showcasing the beauty of the star shape. By using variations of blues, pinks, greens, or neutrals, you can achieve a stylish look that complements modern interiors. This variation is especially popular among crafters who prefer a more subtle decorative style.
Another fun idea is adding a border around the star. A simple round of single crochet in one color can frame your coaster beautifully, giving it a clean and finished look. The border can also help reinforce the shape, making the coaster more durable and long-lasting. This small addition elevates the final result significantly.
Experimenting with textured yarns can also lead to stunning results. Soft, fluffy, or glittery yarns add personality and dimension to your coaster. While textured yarn might make stitches harder to see, the final effect is unique and eye-catching. This technique is perfect for festive or themed coasters.
Finally, you can create sets of stars in different color combinations. These sets make wonderful handmade gifts and can be tailored to specific occasions or seasons. By following the Rainbow Star Crochet Coaster Pattern-Step by Step Tutorial, you can easily produce multiple coasters that look coordinated yet individually unique.
To ensure your project turns out beautifully, there are several helpful tips to keep in mind while following the Rainbow Star Crochet Coaster Pattern-Step by Step Tutorial. One essential tip is to maintain consistent tension throughout the coaster. Because the star has multiple points, uneven tension can cause one side to stretch or distort. Practicing smooth and even stitches leads to a more polished final result.
Stitch markers can be extremely helpful when working in the round or creating points. They allow you to know exactly where a point begins and ends, preventing mistakes and saving time. This tool is especially useful if you are new to star-shaped designs or working with multiple colors.
When switching colors, always complete the last stitch of the old color with the new color. This gives your transitions cleaner edges and reduces the appearance of knots. Clean color changes make the rainbow effect look smoother and more professional, enhancing the beauty of your coaster.
Blocking your coaster can also improve its appearance significantly. Wet blocking or steam blocking helps the star lay flat and enhances the shape of each point. This finishing touch makes your coaster look crisp and uniform, especially if you plan to gift or sell it.
Another helpful tip is to weave in ends as you go. Since rainbow patterns require multiple colors, waiting until the end can be overwhelming. Weaving in a few ends after each round keeps your work neat and manageable. This habit ensures a smoother crafting experience.
Finally, practice patience and enjoy the process. The Rainbow Star Crochet Coaster Pattern-Step by Step Tutorial is meant to be fun and relaxing. Taking your time allows you to appreciate each stitch and enjoy the satisfaction of creating a handmade piece full of color and charm.
What yarn works best for rainbow star coasters?
Cotton yarn is ideal because it provides structure, durability, and beautiful stitch definition.
Can beginners follow this pattern?
Yes, the Rainbow Star Crochet Coaster Pattern-Step by Step Tutorial is beginner-friendly and includes simple stitches.
How long does it take to make one coaster?
Depending on your speed, one coaster usually takes between 20 and 40 minutes.
Can I use fewer colors instead of a full rainbow?
Absolutely. You can use two, three, or any number of colors you prefer.
How do I keep the star shape firm?
Use the correct hook size, maintain even tension, and consider blocking the finished piece.
Can I make the coaster larger?
Yes. Add more rounds before starting the star points or use thicker yarn and a larger hook.
This complete guide on the Rainbow Star Crochet Coaster Pattern-Step by Step Tutorial has shown you how to choose materials, follow the steps, customize your coaster, and apply helpful tips for the best results.
With creativity and patience, you can create beautiful rainbow star coasters that brighten any space. I hope this tutorial inspires you to craft your own colorful set.
Please leave your sincere opinion and share suggestions so I can continue creating helpful content for your crochet journey!


