
Strawberry crochet hair tie pattern

How to Crochet a Simple Leaf – Step by Step Tutorial is a perfect beginner-friendly guide that allows you to add natural charm to your crochet projects. Whether you’re looking to create a small embellishment for your hat, scarf, blanket, or keychain, a crocheted leaf is a beautiful and versatile detail. Learning how to crochet a simple leaf not only enhances your skills but also allows you to experiment with textures, colors, and creativity.
The How to Crochet a Simple Leaf – Step by Step Tutorial focuses on crafting a basic leaf that you can make in minutes using leftover yarn. It’s an ideal addition for seasonal designs like autumn garlands, spring flowers, or even handmade cards. You can use any yarn you have, making it a sustainable and satisfying project with endless customization options.
As you follow this How to Crochet a Simple Leaf – Step by Step Tutorial, you’ll learn to shape the leaf, add a spine or veins for realism, and even change its size just by adjusting your hook or yarn. Whether you’re brand new to crochet or have years of experience, this easy pattern will become a staple in your collection. Now, let’s dive into the materials and foundational stitches you’ll need.
Before starting your How to Crochet a Simple Leaf – Step by Step Tutorial, you’ll need a few simple materials. You don’t need anything fancy—this project is all about using what’s already in your stash.
You’ll need any type of yarn for your leaf, but lightweight yarns like cotton or acrylic provide great definition. Choose green shades for realism or get playful with bold colors for a decorative twist. This is your opportunity to be creative.
Pair your yarn with an appropriate hook size. If your yarn is DK or worsted weight, a 3.5mm to 4mm hook works best. Using a smaller hook makes the leaf tighter and more structured, while a larger hook gives a looser, more flowy leaf.
The main stitches in this How to Crochet a Simple Leaf – Step by Step Tutorial are chain (ch), slip stitch (sl st), single crochet (sc), half double crochet (hdc), double crochet (dc), and treble crochet (tr). If you know these, you’re ready to begin.
If you’re new, don’t worry. These stitches are easy to learn, and this pattern includes them in a gradual, repetitive sequence that helps you practice as you go. You’ll be surprised how quickly your fingers memorize the rhythm.
You may also want a yarn needle to weave in your ends neatly when you’re finished, and a pair of scissors to trim off any extra yarn. Blocking is optional but gives a professional finish to your final leaf.
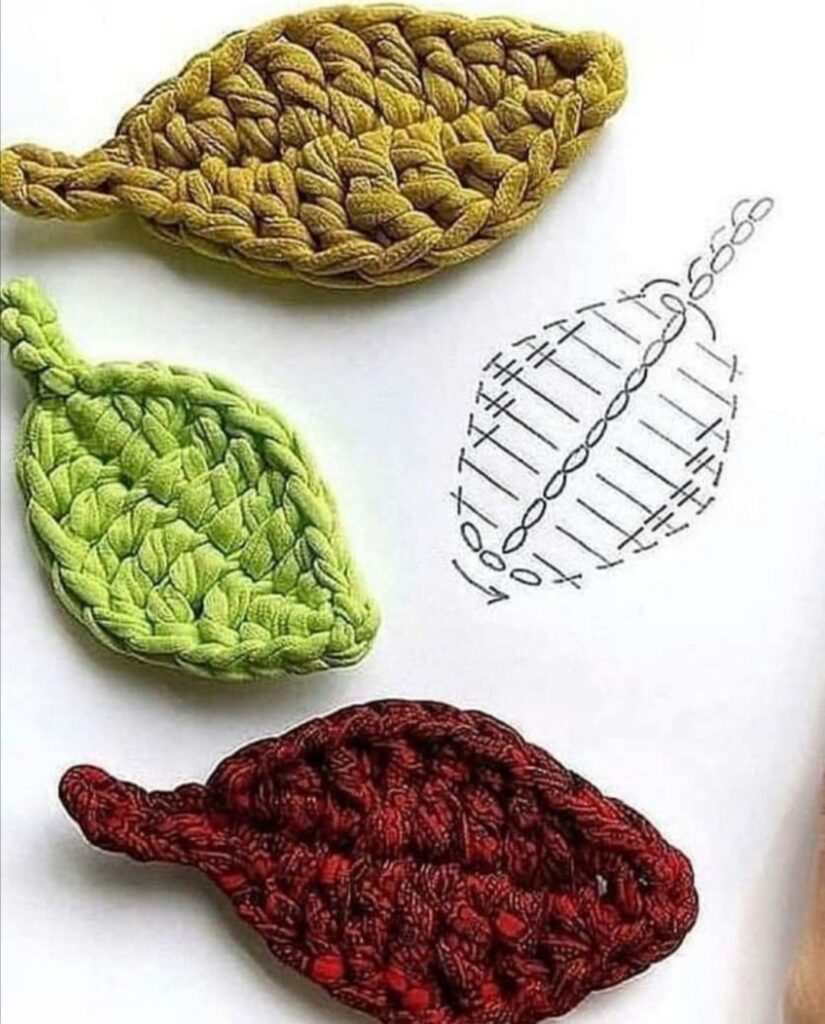
Now let’s begin the How to Crochet a Simple Leaf – Step by Step Tutorial by working through the actual stitches. These steps will guide you through creating a neat and symmetrical leaf shape with a central vein.
Start by chaining 10. This will be the base for the leaf’s length. If you want a larger leaf, chain more. For a smaller one, reduce the number. Your chain should be flexible but not too loose.
On the second chain from the hook, begin with a slip stitch. Then work one single crochet in the next stitch, followed by one half double crochet in the next. This gives the bottom of the leaf a round start.
Now continue with one double crochet in each of the next two chains. You’ll see the leaf beginning to widen. In the following chain, place one treble crochet to give your leaf a gentle peak.
Continue back down the chain with the following: one double crochet in the next two chains, one half double crochet in the next, and one single crochet. Finish with a slip stitch in the final chain. This completes one side of the leaf.
Do not fasten off yet. Instead, rotate your work and crochet along the opposite side of the starting chain, mirroring the same stitches you did earlier. This symmetry gives the leaf a realistic, full look.
At the end of the second side, fasten off and weave in your ends. You now have your basic leaf shape. You can block the leaf if desired to flatten it and define the shape even more.
With the base of the How to Crochet a Simple Leaf – Step by Step Tutorial complete, you can add optional touches to bring your leaf to life. These techniques add detail, texture, and realism.
To give the leaf a spine, reattach your yarn at the base of the leaf and slip stitch up the center, placing your stitches in the gaps between the rows on both sides. This creates a subtle central vein.
Want a more intricate leaf? Try making vein lines by surface slip stitching along the sides from the middle out to the edge. It gives the appearance of veins just like a real leaf.
Experiment with picot stitches along the edges to give a ruffled or spiky effect. Simply add a picot stitch between your double crochets as you crochet around for added detail.
You can also make multicolor leaves by switching yarn colors halfway through the pattern or by using a variegated yarn. These choices add a beautiful gradient effect.
If your leaf is curling, lightly steam or block it flat using pins and a damp towel. This ensures that the stitches settle evenly and the shape holds over time.
For even more dimension, hold two strands of yarn together while working the pattern. This makes a thicker leaf, great for pins, keychains, or bag embellishments.
Once you’ve finished the How to Crochet a Simple Leaf – Step by Step Tutorial, you can use your leaf in a wide variety of projects. These little accents are more than just decoration.
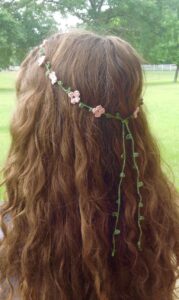
Use your leaf as an applique on scarves, hats, or headbands. It instantly adds a handmade flair and makes your gift items stand out with a nature-inspired touch.
Combine several leaves with crocheted flowers to create a bouquet or garland. Add a few twigs or beads to make an eye-catching table centerpiece.
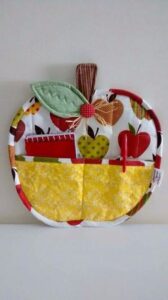
Stitch your leaf onto a fabric pouch or tote bag for a custom nature-themed accessory. It’s a subtle detail that personalizes plain bags or garments.
Make seasonal décor by attaching multiple leaves to a string to form an autumn bunting. Use fall colors like orange, brown, and gold to fit the season.
You can even use your crochet leaves as gift toppers. Add them to ribbons or string to create an eco-friendly and reusable embellishment for presents.
Add your leaf to a keychain, especially when paired with a tiny crocheted flower or charm. It’s lightweight and adds charm without bulk.
What yarn is best for crocheting a leaf?
Cotton yarn is recommended because it holds shape well and shows stitch definition clearly. However, acrylic and wool blends also work, depending on the texture you want.
Can I make the leaf larger or smaller?
Yes, simply increase or decrease the number of chains in the foundation chain to adjust the size. You can also change your hook or yarn weight.
Do I need to block the leaf?
Blocking is optional. If your leaf curls or looks uneven, a light blocking will help it lie flat and improve the overall appearance.
Can beginners follow this tutorial?
Absolutely. This How to Crochet a Simple Leaf – Step by Step Tutorial is ideal for beginners since it uses only basic stitches and is quick to complete.
How can I attach the leaf to other projects?
Use a yarn needle to sew the leaf onto other crochet pieces or fabric. You can also use a dab of hot glue if sewing isn’t an option.
Can I use this pattern with different stitch styles?
Yes! Once you’re confident with the basic pattern, feel free to substitute stitches or add creative details like lace or popcorn stitches for variety.
In this How to Crochet a Simple Leaf – Step by Step Tutorial, we covered everything from the materials and basic stitches to shaping your leaf and adding creative details. You’ve learned how to construct a symmetrical leaf, add texture, and use it in various projects. With practice, you can even create your own versions by adjusting size, color, or stitch style.
Crocheting small items like leaves is a great way to use up scrap yarn and bring a touch of nature into your work. They’re fast, satisfying, and incredibly versatile. Whether you’re using them for décor, gifts, or fashion accessories, these little leaves carry big charm.
We’d love to hear what you think! Have you tried this tutorial? Did you put your leaf to use in a unique way? Please leave your sincere opinion, share your experiences, and suggest any ideas for future tutorials. Your feedback is always welcome!


