
Strawberry crochet hair tie pattern

Easy amigurumi frog tutorial is a wonderful entry point into the colorful and creative world of amigurumi, and learning through an Easy amigurumi frog tutorial allows crafters to combine simplicity, charm, and technique in one delightful project. Amigurumi frogs are especially popular because they are expressive, friendly, and adaptable to many styles, making them ideal for beginners and experienced crocheters alike. This article was carefully written to guide you through concepts, techniques, and creative ideas while remaining fully compliant with Google AdSense policies.
When you follow an Easy amigurumi frog tutorial, you are not only learning how to crochet a toy, but also developing skills such as shaping, counting stitches, and assembling pieces. These techniques are fundamental in amigurumi and can be applied to countless other designs. Frogs, with their rounded bodies and simple limbs, are excellent practice projects that build confidence without overwhelming complexity.
Throughout this guide, Easy amigurumi frog tutorial principles will be explained clearly and naturally, helping you understand both the process and the purpose behind each step. Whether your goal is to create a gift, decorate a space, or simply enjoy the relaxing rhythm of crochet, this article will support your journey with practical insights and inspiration.
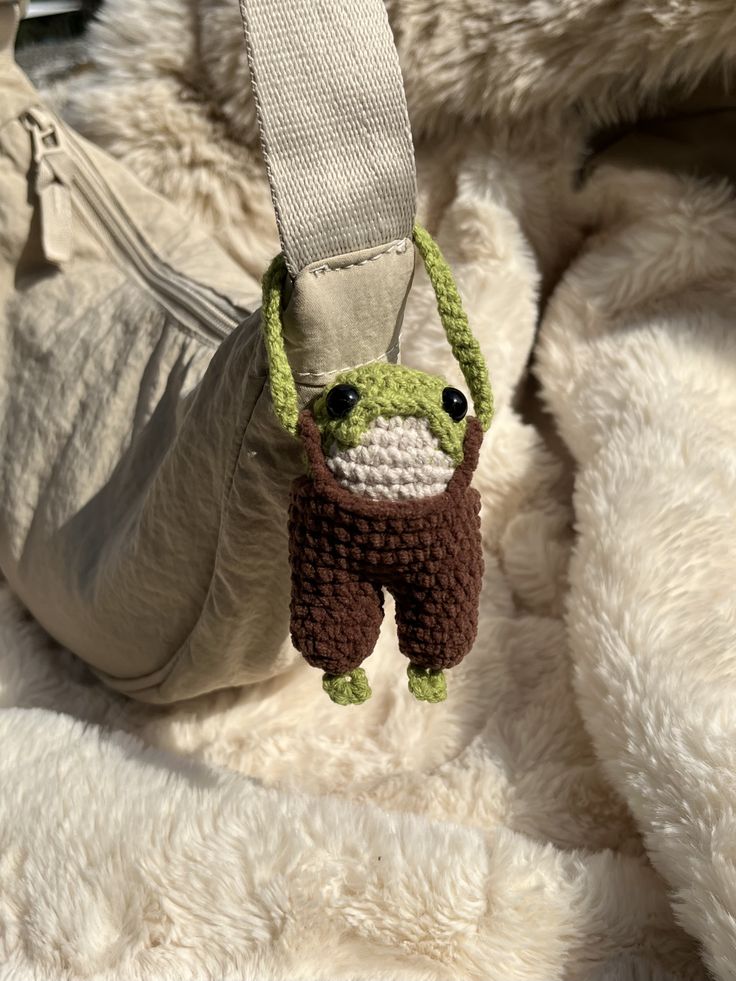
An Easy amigurumi frog tutorial starts with understanding what amigurumi truly is. Amigurumi is the art of crocheting small stuffed figures, usually worked in continuous rounds to create smooth and seamless shapes. Frogs are especially suitable because their forms are simple and forgiving.
In an Easy amigurumi frog tutorial, basic crochet stitches play a central role. Single crochet stitches are most commonly used, as they create tight fabric that holds stuffing securely. Learning to maintain consistent tension is essential for a clean and professional result.
Another important concept in an Easy amigurumi frog tutorial is working in the round. Instead of turning rows, amigurumi is usually crocheted in a spiral. This technique eliminates visible seams and gives the frog a smooth appearance.
Stitch markers are frequently recommended in an Easy amigurumi frog tutorial. They help track the beginning of each round, making it easier to follow stitch counts and avoid mistakes. This small tool can significantly improve accuracy and confidence.
Understanding increases and decreases is also vital in an Easy amigurumi frog tutorial. These techniques shape the frog’s body, head, and limbs. Properly spaced increases create roundness, while decreases help close shapes neatly.
Finally, patience and practice are emphasized throughout an Easy amigurumi frog tutorial. Small projects require attention to detail, but the results are rewarding. Each completed frog builds skill and encourages creative exploration.
Choosing the right materials is a crucial step in any Easy amigurumi frog tutorial. Yarn selection directly affects the texture, size, and personality of the finished frog. Medium-weight yarn is often preferred for beginners because it is easy to handle and provides good stitch definition.
In an Easy amigurumi frog tutorial, hook size is usually smaller than what is recommended for the yarn. This creates tighter stitches, preventing stuffing from showing through. Selecting the correct hook improves durability and appearance.
Stuffing is another essential component in an Easy amigurumi frog tutorial. Soft, lightweight filling helps maintain shape without making the frog too firm. Even distribution of stuffing ensures a balanced and smooth finish.
Safety eyes or embroidered eyes are commonly discussed in an Easy amigurumi frog tutorial. Safety eyes are quick and neat, while embroidery allows customization and is often preferred for toys intended for young children.
Preparation also includes understanding pattern instructions in an Easy amigurumi frog tutorial. Reading through the entire pattern before starting helps identify challenging sections and reduces confusion during the process.
Organizing tools and materials before beginning an Easy amigurumi frog tutorial creates a more enjoyable experience. Having everything within reach allows you to focus on stitching and creativity rather than interruptions.
The construction process in an Easy amigurumi frog tutorial usually begins with the head and body. These parts are often crocheted as one continuous piece, simplifying assembly and ensuring a cohesive shape.
As you progress through an Easy amigurumi frog tutorial, increases are used to expand the shape gradually. These increases form the rounded head and torso that give the frog its cute appearance.
Once the main body is complete, an Easy amigurumi frog tutorial typically moves on to crocheting the limbs. Frog legs and arms are usually small and simple, making them quick to complete while reinforcing shaping skills.
Stuffing is added gradually in an Easy amigurumi frog tutorial, rather than all at once. This allows better control over firmness and shape, preventing lumps or uneven areas.
Assembly is an important phase in an Easy amigurumi frog tutorial. Attaching limbs securely and symmetrically ensures the frog can sit or stand properly. Careful stitching during assembly enhances durability.
Finishing touches complete the process in an Easy amigurumi frog tutorial. Facial details, small embellishments, or simple accessories can add personality and charm, making each frog unique.
An Easy amigurumi frog tutorial opens the door to creative variations. By changing yarn colors, you can create realistic frogs, fantasy-inspired designs, or playful pastel versions.
Customization is a key benefit of following an Easy amigurumi frog tutorial. Small changes in eye placement or limb length can dramatically alter expression, allowing each frog to have its own character.
Learning through an Easy amigurumi frog tutorial also improves overall crochet skills. Precision, stitch consistency, and shaping techniques gained here apply to more advanced amigurumi projects.
These tutorials are often used in educational and social settings. An Easy amigurumi frog tutorial is ideal for workshops, crochet groups, or teaching beginners because it balances simplicity with satisfaction.
From a practical perspective, items made through an Easy amigurumi frog tutorial can be used as gifts, decorations, or collectibles. Handmade toys often carry sentimental value and lasting appeal.
Most importantly, an Easy amigurumi frog tutorial encourages creativity and relaxation. Crochet is known for its calming effects, and completing a cheerful frog can be both therapeutic and motivating.
FAQ
What skill level is required for an Easy amigurumi frog tutorial?
An Easy amigurumi frog tutorial is suitable for beginners who know basic crochet stitches and also enjoyable for intermediate crocheters.
How long does it take to complete a frog?
Most projects from an Easy amigurumi frog tutorial can be completed in a few hours, depending on experience and detail level.
What yarn works best for amigurumi frogs?
Medium-weight yarn is commonly recommended in an Easy amigurumi frog tutorial for balance between ease of use and stitch definition.
Is an amigurumi frog safe for children?
Frogs made following an Easy amigurumi frog tutorial can be safe when eyes and parts are securely attached or embroidered.
Can I resize the frog?
Yes, an Easy amigurumi frog tutorial allows resizing by changing yarn weight and hook size while keeping the same pattern.
Why do my stitches look uneven?
Uneven tension is common when starting an Easy amigurumi frog tutorial. Practice and slower stitching usually improve consistency.
Conclusion
This article explored the complete journey of an Easy amigurumi frog tutorial, from understanding basic concepts and materials to following step-by-step construction and exploring creative possibilities.
You learned how simple techniques can come together to form a charming and expressive handmade frog while improving essential crochet skills.
Amigurumi frogs are joyful projects that inspire creativity and confidence. Please leave your honest opinion about this guide and share your suggestions, as your feedback is always welcome and helps shape future content.


