
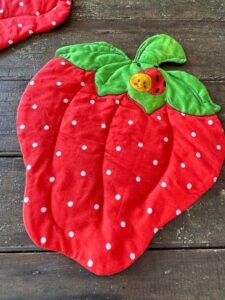
Strawberry crochet hair tie pattern

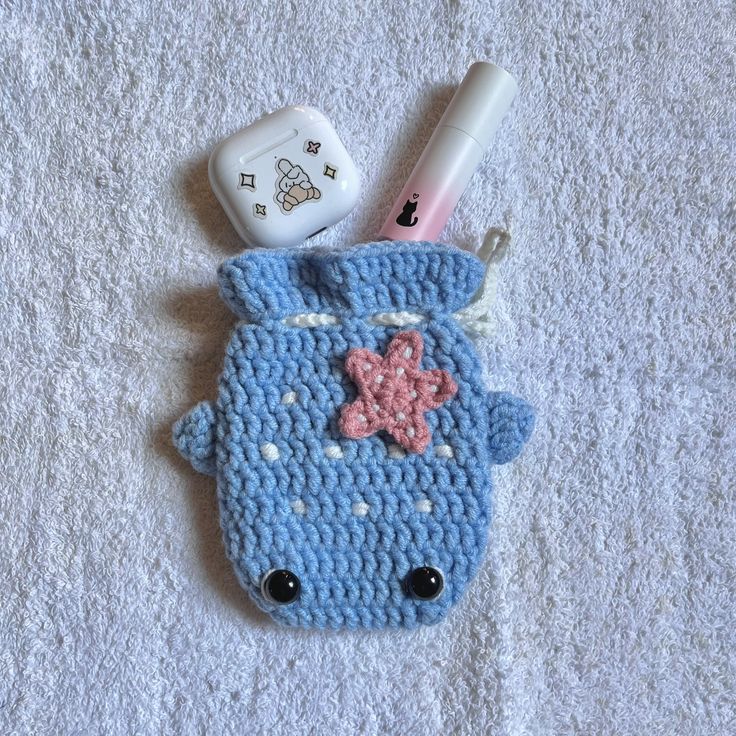
Crochet Whale Drawstring Pouch Tutorial is a creative and practical guide designed to help crafters create an adorable, ocean-inspired accessory. If you are searching for a fun handmade project that combines functionality with charm, this Crochet Whale Drawstring Pouch Tutorial will walk you through every essential detail. From selecting the right yarn to shaping the whale’s body and adding a secure drawstring closure, this project is suitable for beginners and experienced crocheters alike. The finished pouch can be used to store small items such as coins, jewelry, craft supplies, or small gifts.
The beauty of following a Crochet Whale Drawstring Pouch Tutorial lies in its versatility. You can customize the whale’s size, color palette, facial features, and drawstring style according to your preferences. This type of crochet project also makes a thoughtful handmade gift for children, marine-life enthusiasts, or anyone who appreciates cute and practical accessories. By focusing on proper stitch techniques and careful assembly, you can achieve a polished and durable result that stands the test of time.
In this comprehensive article, you will learn everything you need to know about completing a successful Crochet Whale Drawstring Pouch Tutorial. We will cover materials, step-by-step construction, shaping techniques, creative customization ideas, and expert tips for achieving professional results. Additionally, the FAQ section will answer the most common questions people ask online about this project. The content is structured with SEO best practices in mind, using the main keyword in bold throughout the article to improve clarity and relevance.
Choosing the right materials is the first step in completing your Crochet Whale Drawstring Pouch Tutorial successfully. Medium-weight cotton or acrylic yarn works best because it provides structure while remaining soft and comfortable to handle. Cotton yarn is particularly recommended if you want a firm pouch that holds its shape well.
Selecting the correct crochet hook size is equally important. A hook that matches your yarn weight ensures even stitches and proper tension. Most medium-weight yarns pair well with hooks between 3.5 mm and 5.0 mm, depending on your tension.
You will also need a yarn needle for sewing parts together and weaving in ends. A tapestry needle makes assembly smooth and secure. Stitch markers can help keep track of rounds when working in continuous spirals.
Safety eyes or embroidered details can be used to create the whale’s facial features. If the pouch is intended for young children, embroidery is often the safest option. Always prioritize secure attachment for safety and durability.
A drawstring cord or crocheted chain will complete the pouch closure. You may use matching yarn or a contrasting color for visual interest. The drawstring should glide smoothly through the top edge without snagging.
Finally, scissors and a measuring tape will help maintain precision. Proper measurement ensures the pouch is symmetrical and proportional, enhancing the overall look of your finished project.
To begin the Crochet Whale Drawstring Pouch Tutorial, start by crocheting a magic ring and working single crochet stitches in the round. Gradually increase stitches in the first few rounds to form a circular base. This base will determine the size of your pouch.
Continue working evenly in rounds to build the whale’s body. Maintaining consistent tension is crucial to prevent gaps or uneven fabric. Working in a spiral without joining rounds creates a smooth finish.
Once the body reaches the desired height, create small openings near the top for the drawstring. This can be achieved by chaining a few stitches and skipping corresponding stitches below. These evenly spaced openings allow the cord to pass through easily.
To shape the whale’s tail, crochet two small triangular pieces and attach them securely at the back of the pouch. Proper positioning ensures balance and symmetry. Reinforce stitches at connection points for durability.
Add side fins by crocheting small oval shapes and sewing them onto the body. These small details bring the whale design to life and enhance the overall appearance.
Finish the pouch by weaving the drawstring through the top openings. Pulling the string tight should close the pouch smoothly. Adjust tension to ensure it opens and closes comfortably.
One of the most enjoyable aspects of following a Crochet Whale Drawstring Pouch Tutorial is the ability to personalize the design. You can experiment with various shades of blue, gray, or even pastel colors for a playful twist.
Consider adding decorative embroidery such as small water splashes or a smiling mouth. Simple stitched details can significantly enhance character and charm.
You can vary the pouch size depending on its purpose. A smaller version is perfect for coins or jewelry, while a larger pouch can hold craft tools or small accessories.
Textured stitches such as half double crochet or subtle ribbing can add dimension to the whale’s body. Texture variation makes the project visually interesting without complicating the process.
For a themed gift, you might pair the whale pouch with ocean-inspired items. Matching colors and motifs create a cohesive and thoughtful presentation.
You can also experiment with braided or twisted drawstrings for added durability and style. Decorative cord ends, such as small knots or beads, provide a polished finish.
Consistency in stitch size is essential for a professional result. Uneven tension may cause the pouch to appear lopsided or loose in certain areas.
Count stitches regularly when working in rounds. Accurate stitch counts maintain symmetry and prevent unintended shaping issues.
Secure all attachments carefully. Fins, tails, and facial features should be firmly sewn to withstand regular use.
If the pouch feels too soft, consider using a slightly smaller hook size. Tighter stitches create a more structured fabric.
Light blocking can help shape the finished pouch. Gently steaming or shaping by hand improves overall appearance.
Take your time during assembly. Careful placement of each component ensures your Crochet Whale Drawstring Pouch Tutorial results in a balanced and charming final product.
Is the Crochet Whale Drawstring Pouch Tutorial beginner-friendly?
Yes, this project is suitable for beginners who are comfortable with basic stitches such as single crochet and working in the round.
How long does it take to complete the pouch?
Most crafters can finish the pouch in a few hours, depending on experience level and customization details.
Can I use leftover yarn for this project?
Absolutely. This tutorial is a great way to use yarn scraps, as long as the yarn weights are similar.
How do I ensure the drawstring works smoothly?
Make evenly spaced openings and use a cord that slides easily through stitches. Test the closure before finishing.
Is this pouch washable?
Yes, as long as you follow the care instructions for your chosen yarn. Cotton yarn is especially easy to maintain.
Can I sell finished whale pouches?
Yes, handmade items created from your own work can typically be sold, provided you follow local regulations and ensure quality craftsmanship.
Conclusion
This detailed Crochet Whale Drawstring Pouch Tutorial has guided you through materials, step-by-step instructions, creative customization ideas, and essential tips for achieving a polished finish.
By focusing on consistent stitches, secure attachments, and thoughtful design choices, you can create a charming and functional whale-themed pouch suitable for many uses. Whether you are making it for yourself, as a gift, or to expand your handmade collection, this project combines creativity with practicality.
We hope this comprehensive guide has inspired you to begin your own Crochet Whale Drawstring Pouch Tutorial today. Please share your honest opinion and suggestions, as your feedback helps improve future tutorials and supports a growing crafting community.


