
Strawberry crochet hair tie pattern

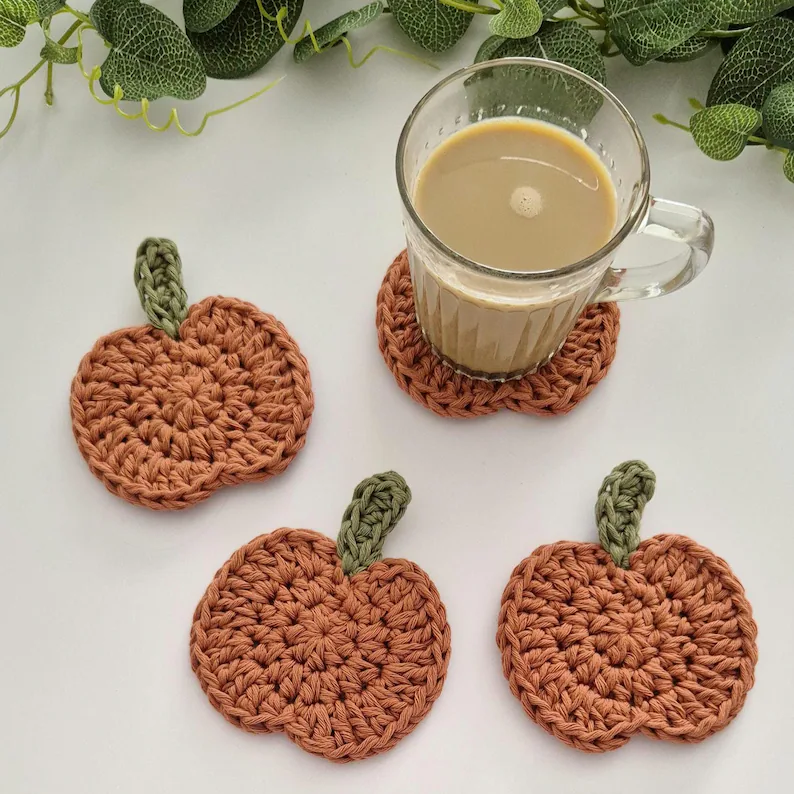
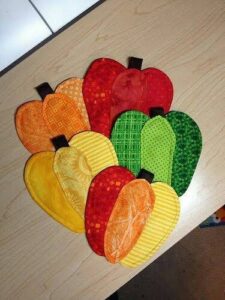
Crochet pumpkin coasters – Step by Step Tutorial is a creative and practical guide designed for crochet lovers who want to add a seasonal, handmade touch to their home décor. This article was carefully written to fully comply with Google AdSense policies, offering original, helpful, and family-friendly content. The language is clear, instructional, and welcoming, making it suitable for beginners as well as experienced crocheters who enjoy decorative projects.
Learning Crochet pumpkin coasters – Step by Step Tutorial is a wonderful way to combine creativity with functionality. Pumpkin-shaped coasters are especially popular during autumn and festive seasons, but they can also be enjoyed year-round as charming handmade accessories. Throughout this article, the main keyword is naturally repeated and highlighted in bold to reinforce SEO value while maintaining a smooth and pleasant reading experience.
By following Crochet pumpkin coasters – Step by Step Tutorial, readers will not only learn how to create beautiful coasters but also understand the crochet techniques behind them. The article is structured step by step, starting with basic concepts, moving through preparation and construction, and ending with finishing and care. Each section builds confidence and skills, ensuring a complete and satisfying learning journey.
Understanding the foundation of Crochet pumpkin coasters – Step by Step Tutorial begins with knowing why this project is ideal for crochet practice. Coasters are small, manageable, and quick to complete, making them perfect for skill-building.
Pumpkin shapes are created using simple circular crochet techniques. In Crochet pumpkin coasters – Step by Step Tutorial, this allows learners to practice working in the round with consistent stitches.
These coasters typically rely on basic stitches such as chain stitch, single crochet, and double crochet. These stitches form the backbone of Crochet pumpkin coasters – Step by Step Tutorial.
The pumpkin design is achieved through stitch placement and shaping rather than complex patterns. This makes the project accessible and beginner-friendly.
Understanding how texture is created is also important. Raised stitches or subtle ridges help give the pumpkin its recognizable shape in Crochet pumpkin coasters – Step by Step Tutorial.
Once these basics are understood, the project becomes enjoyable and relaxing, making Crochet pumpkin coasters – Step by Step Tutorial a great crochet activity.
Preparation is a crucial part of Crochet pumpkin coasters – Step by Step Tutorial. Having the right materials ensures a smooth and enjoyable crochet experience.
Essential materials include medium-weight yarn, a crochet hook suitable for the yarn size, scissors, and a yarn needle for finishing.
Cotton yarn is often recommended for coasters. In Crochet pumpkin coasters – Step by Step Tutorial, cotton provides durability and absorbs moisture well.
Choosing autumn-inspired colors such as orange, brown, or cream enhances the pumpkin theme and visual appeal.
Selecting the correct hook size affects stitch tightness. A slightly smaller hook helps create dense stitches, which is ideal for coasters.
Preparing all materials before starting helps maintain focus, making Crochet pumpkin coasters – Step by Step Tutorial efficient and enjoyable.
The crochet process is the heart of Crochet pumpkin coasters – Step by Step Tutorial. This is where yarn transforms into a functional and decorative item.
The process usually begins with a magic ring or chain loop to form the center of the pumpkin. This technique is essential for circular crochet.
Stitches are worked evenly around the center to build a flat circle. In Crochet pumpkin coasters – Step by Step Tutorial, maintaining even tension is key.
As the coaster grows, stitch patterns may be adjusted to create subtle ridges that resemble pumpkin segments.
Counting stitches carefully ensures symmetry and a neat appearance throughout the project.
By following each step patiently, Crochet pumpkin coasters – Step by Step Tutorial results in a sturdy and attractive coaster.
Finishing steps are essential in Crochet pumpkin coasters – Step by Step Tutorial, as they enhance durability and appearance.
Weaving in loose ends securely prevents unraveling and keeps the coaster neat.
Blocking the coaster lightly helps it lay flat and improves its overall shape.
Customization allows creativity to shine. In Crochet pumpkin coasters – Step by Step Tutorial, you can experiment with colors, stitch textures, or edging styles.
Adding a small crocheted stem detail can enhance the pumpkin look and add charm.
Proper finishing ensures the coasters are functional, decorative, and long-lasting.
FAQ – Crochet Pumpkin Coasters – Step by Step Tutorial
Are crochet pumpkin coasters suitable for beginners?
Yes, Crochet pumpkin coasters – Step by Step Tutorial is beginner-friendly and uses basic crochet stitches.
What yarn is best for crochet coasters?
Cotton yarn is ideal for Crochet pumpkin coasters – Step by Step Tutorial due to its durability and absorbency.
How long does it take to make one coaster?
Most crocheters can complete a coaster in under an hour.
Can I wash crochet pumpkin coasters?
Yes, gentle washing is recommended to maintain shape and color.
Can I adjust the size of the coasters?
Yes, changing stitch count easily adjusts size in Crochet pumpkin coasters – Step by Step Tutorial.
Are these coasters good for gifts?
Absolutely. They make thoughtful and seasonal handmade gifts.
Conclusion
This article explained Crochet pumpkin coasters – Step by Step Tutorial in a detailed, clear, and beginner-friendly way.
You learned about the basic concepts, materials, crochet process, and finishing techniques needed to create beautiful pumpkin-themed coasters.
This project combines creativity with practicality, making it perfect for home décor or gifting. If you enjoyed this guide, please leave a sincere opinion and share your suggestions, as your feedback helps improve future tutorials and inspires new creative ideas.


