
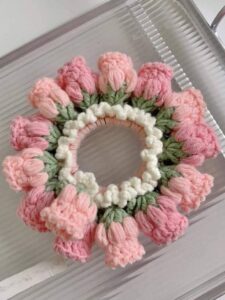
Strawberry crochet hair tie pattern

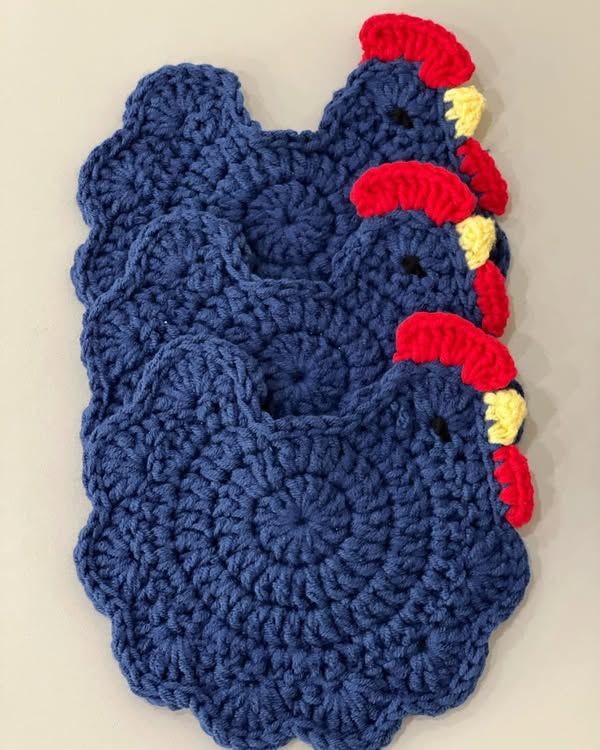
Crochet a Chicken Coaster is a delightful and creative project that combines functionality with charm, making it perfect for anyone who loves handmade décor. If you have been searching for a fun and beginner-friendly crochet idea, learning how to Crochet a Chicken Coaster can be both relaxing and rewarding. This simple yet eye-catching design adds personality to your table setting while protecting surfaces from heat and moisture. Whether you are a crochet enthusiast or just starting your journey, this project offers the ideal balance between creativity and practicality.
When you decide to Crochet a Chicken Coaster, you are not only making a practical item but also creating something unique that can brighten your kitchen or dining area. Handmade coasters are increasingly popular because they reflect personal style and care. A chicken-shaped coaster, in particular, adds a farmhouse touch that feels warm and inviting. With the right yarn and hook, this pattern can be completed in just a short time, making it a great weekend craft.
Another reason why so many crafters choose to Crochet a Chicken Coaster is the opportunity to experiment with colors, textures, and stitches. From classic white hens with red combs to colorful and playful interpretations, the possibilities are endless. This project is also perfect for gifting, selling at craft fairs, or simply adding a seasonal accent to your home. By following simple steps and understanding key crochet techniques, you can easily master this charming design.
Before you begin to Crochet a Chicken Coaster, gathering the right materials is essential. The most commonly used yarn for this project is 100% cotton because it is durable, heat-resistant, and absorbent. Cotton yarn helps the coaster maintain its shape while effectively protecting surfaces from hot cups or cold drinks.
Choosing the correct crochet hook size also plays a significant role in achieving the perfect result. Typically, a 3.5mm to 4.5mm hook works well with medium-weight cotton yarn. The right hook ensures that your stitches are tight enough to create a sturdy coaster without being overly stiff.
You will also need a yarn needle to weave in loose ends neatly. Clean finishing is important when you Crochet a Chicken Coaster, especially if you plan to give it as a gift. A small pair of scissors will help trim excess yarn for a polished look.
Stitch markers can be helpful, particularly if you are working in rounds. They allow you to keep track of your starting point and maintain symmetry in your design. This is especially useful when shaping the circular body of the chicken.
Basic crochet knowledge is recommended for this project. Understanding stitches such as chain (ch), single crochet (sc), half double crochet (hdc), and double crochet (dc) will make the process much smoother. These foundational stitches form the base of most chicken coaster patterns.
Lastly, creativity and patience are your most valuable tools. When you Crochet a Chicken Coaster, enjoy the process and allow yourself to experiment with different yarn colors and embellishments like small embroidered eyes or textured wings.
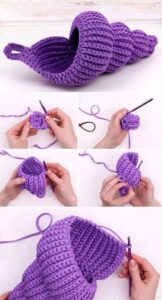
To successfully Crochet a Chicken Coaster, begin by creating a magic ring or a small chain circle. This forms the center of the chicken’s body. Work several single crochet stitches into the ring to create a tight and stable base.
Continue increasing evenly in each round to form a flat circle. Consistent increases are essential to prevent the coaster from curling. When you Crochet a Chicken Coaster, maintaining a flat shape ensures that cups and glasses sit evenly on top.
Once the circular body reaches your desired size, you can start shaping the chicken’s head. This usually involves crocheting a small semi-circle extension at the top of the main body. Careful stitch placement helps create a smooth and natural transition.
Next, crochet the comb and beak. The comb is often made using small chains and slip stitches to create a scalloped effect. The beak can be formed with a few tight stitches in a contrasting color such as orange or yellow.
Adding wings is optional but highly recommended for visual appeal. You can create small textured shapes using half double crochet stitches and attach them symmetrically on each side. This detail enhances the recognizable chicken silhouette.
Finally, weave in all loose ends securely. Blocking the coaster lightly with steam can help it lay perfectly flat. After completing these steps, you will have successfully learned how to Crochet a Chicken Coaster that is both functional and decorative.
One of the most enjoyable aspects of choosing to Crochet a Chicken Coaster is customizing the design. You can experiment with different yarn colors to match seasonal themes, such as pastel shades for spring or rich tones for autumn.
Texture can also elevate your project. Using front loop or back loop stitches adds dimension to the chicken’s body. Subtle texture changes can make your handmade coaster look more detailed and professional.
Another creative idea is adding small embroidered details. Simple stitched eyes or decorative edging around the body can make your Crochet a Chicken Coaster design more expressive and charming.
You may also create a matching set with slight variations in color or size. A coordinated set of chicken coasters makes a wonderful housewarming gift or kitchen accessory collection.
For those who enjoy farmhouse décor, sticking to traditional white, cream, and red color combinations creates a classic aesthetic. This timeless look complements rustic kitchen styles beautifully.
If you are crafting for children or themed events, consider playful colors like pink, blue, or even rainbow tones. The flexibility of the Crochet a Chicken Coaster pattern allows you to tailor it to any preference or occasion.
When you Crochet a Chicken Coaster, you are practicing mindfulness and relaxation. Crochet is known for reducing stress and promoting focus. The repetitive motion of stitching can have a calming effect.
This project is also budget-friendly. With minimal yarn and simple tools, you can produce multiple coasters at a low cost. This makes it ideal for beginners or those exploring handmade crafts as a small business idea.
Another advantage of learning to Crochet a Chicken Coaster is skill development. You strengthen your understanding of shaping, stitch consistency, and finishing techniques, which can be applied to more advanced crochet projects later.
Handmade coasters are environmentally friendly alternatives to disposable paper products. Using reusable cotton yarn supports sustainable living and reduces waste in your home.
Additionally, these coasters make thoughtful and personalized gifts. Handmade items often carry sentimental value that store-bought products cannot replicate.
Finally, selling finished coasters at local markets can provide supplemental income. Many people appreciate handcrafted home décor items, especially those with a charming farmhouse theme like a chicken design.
What type of yarn is best to Crochet a Chicken Coaster?
Cotton yarn is highly recommended because it is absorbent, durable, and heat-resistant, making it ideal for coasters.
Is Crochet a Chicken Coaster suitable for beginners?
Yes, beginners with basic knowledge of simple stitches like single crochet and chain stitches can complete this project successfully.
How long does it take to Crochet a Chicken Coaster?
Most crafters can complete one coaster within one to two hours, depending on skill level and design complexity.
Can I wash my crochet chicken coaster?
Yes, if made with cotton yarn, it can typically be machine washed on a gentle cycle and air dried to maintain shape.
How do I keep the coaster flat?
Ensure consistent increases while crocheting the circular base and consider light blocking after completion.
Can I sell items if I Crochet a Chicken Coaster?
Yes, handmade coasters are popular at craft fairs and online marketplaces, provided you follow local selling guidelines.
Conclusion
Learning how to Crochet a Chicken Coaster is a fun, practical, and creative experience that combines craftsmanship with home décor. Throughout this article, you discovered the essential materials, step-by-step instructions, design variations, and benefits of making your own chicken-shaped coaster.
By practicing basic crochet stitches and experimenting with colors and textures, you can create beautiful handmade pieces that protect your surfaces while adding charm to your space.
If you found this guide helpful, please leave your honest opinion and share your suggestions. Your feedback is valuable and helps inspire more creative crochet ideas for everyone.


