
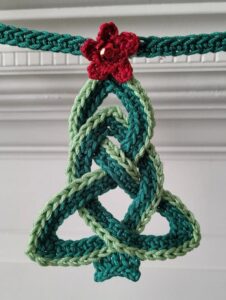
Strawberry crochet hair tie pattern

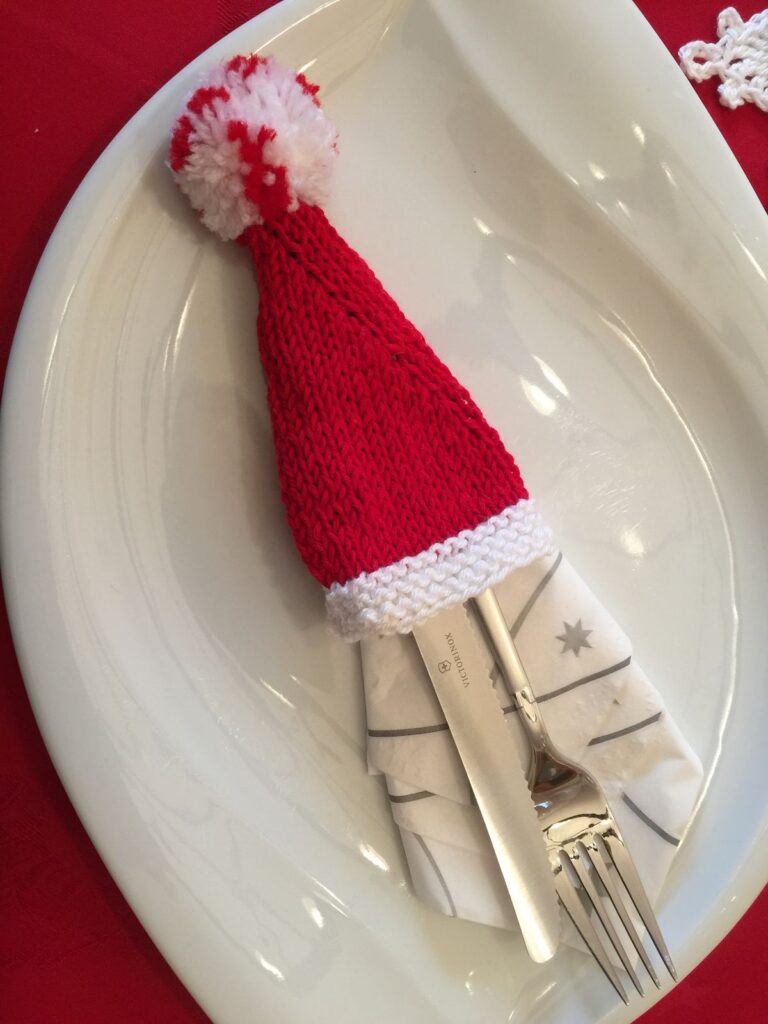
Creating a Christmas Cutlery Holder – Step by Step Tutorial is a wonderful way to bring the magic of the holiday season into your home while showcasing your crafting skills. These festive holders are not only practical but also add a charming decorative touch to your Christmas table. Whether you’re hosting a big family dinner or preparing a cozy holiday meal for two, this project will make your table setting look warm, inviting, and full of holiday cheer. Plus, making them yourself allows you to personalize every detail to suit your taste and style.
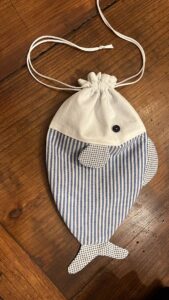
A Christmas Cutlery Holder can be created using simple materials and basic sewing skills, making it an ideal project for beginners and experienced crafters alike. The beauty of this project is that it combines creativity and functionality—you’re not just making something decorative but also useful. These holders can be shaped like Christmas trees, stockings, Santa hats, or even snowflakes. Each design brings a unique festive touch, and you can customize colors and fabrics to match your overall holiday décor theme.
In this Step by Step Tutorial, we’ll explore how to make your own cutlery holders using easy-to-follow instructions, fabric selection tips, and embellishment ideas. You’ll learn how to measure, cut, and sew your holder with precision while adding those finishing touches that make your creation special. Whether you plan to gift these to loved ones or use them for your own Christmas table, this tutorial will help you craft something memorable and heartwarming that everyone will admire.Now, let’s begin crafting your own Christmas Cutlery Holder – Step by Step Tutorial that will light up your holiday dining table with handmade charm.
When starting this Christmas Cutlery Holder – Step by Step Tutorial, it’s essential to choose the right materials to ensure your final product looks neat and festive. The most popular material for this project is cotton fabric because it’s easy to work with, washable, and comes in a variety of Christmas-themed prints. You can find fabrics featuring reindeer, snowflakes, candy canes, or holly leaves that will immediately bring out the Christmas spirit. Felt is another great option, as it doesn’t fray and gives a soft, cozy feel to the holder.
You’ll also need some basic sewing tools like scissors, pins, a ruler or measuring tape, and either a sewing machine or a needle and thread if you prefer to sew by hand. To add structure and durability to your Christmas Cutlery Holder, consider using a layer of interfacing between two pieces of fabric. This helps the holder maintain its shape, especially when you insert the cutlery.
Another creative element you can include is embellishments. Think ribbons, small buttons shaped like stars or snowmen, lace trims, or even embroidery. These little touches make your Christmas Cutlery Holder stand out and look unique. Just remember to keep the embellishments flat so the holder remains practical for use on the table.
It’s also important to decide on a color palette before you begin. Traditional red, green, and white combinations always work beautifully, but you can also try gold and silver for a more elegant look or pastel shades for a modern twist. The goal is to ensure your holder complements your overall table setup and enhances the festive vibe.
Finally, don’t forget about sustainability. You can use leftover fabric scraps from other projects or even upcycle old holiday tablecloths. This not only saves money but also gives new life to materials you already have, making your Christmas Cutlery Holder both eco-friendly and meaningful.
Once you have all your materials ready, you’re set to move on to the next stage: measuring and cutting the pieces that will form the base of your Christmas holder.
To begin this part of the Christmas Cutlery Holder – Step by Step Tutorial, gather all your materials in a clean workspace. Start by deciding the size of your holder. A standard size is about 8 inches tall and 4 inches wide, which perfectly fits a knife, fork, and spoon. Use a ruler to mark your measurements on the fabric and cut two identical pieces—these will form the front and back of your holder.
Next, if you’re using interfacing, cut a piece slightly smaller than your fabric and attach it to one side using an iron (if it’s fusible). This gives extra strength to the holder. Once that’s ready, place the two fabric pieces together with the right sides facing each other, and pin them in place along the edges to prepare for sewing.
Using a sewing machine or hand-stitching, sew around the edges, leaving a small opening at the top so you can turn the fabric right side out. Trim any excess fabric or corners before flipping it. Once turned, press the fabric flat with an iron for a smooth finish. Now, fold the bottom part of the fabric upward to create a pocket—this will hold the cutlery. Pin and sew along the sides to secure the pocket.
You can now get creative with decorations. For example, sew on a strip of ribbon across the pocket, or glue on small fabric shapes like stars, holly leaves, or even a tiny felt Santa hat. You can also use fabric paint to write holiday messages such as “Merry Christmas” or “Joy.” These details personalize your Christmas Cutlery Holder and make it one of a kind.
Once you’re happy with the look, make sure to test it by inserting your cutlery to ensure they fit nicely and the pocket is secure. Adjust if needed by sewing tighter seams. Repeat this process to make as many holders as you need for your dinner table or as gifts.
The key to a beautiful final product is patience and attention to detail. Take your time and enjoy the creative process—it’s part of the fun of making something by hand.
Now comes the most exciting part of this Christmas Cutlery Holder – Step by Step Tutorial: decorating and customizing your creation. This step allows you to express your creativity and style while enhancing the festive appeal of your holder.
You can add hand-stitched embroidery patterns, such as snowflakes, Christmas trees, or bells, using colorful threads that contrast beautifully with your fabric choice. For example, white thread on red fabric gives a clean and bright effect, while gold thread adds elegance and sparkle.
Another idea is to personalize each holder with a family member’s name using felt letters or embroidery. This makes every place setting special and helps guests find their spots at the table. Adding small decorative bows or tiny pom-poms can also make your design more playful and joyful.
If you enjoy using embellishments, consider attaching a small jingle bell or a piece of lace trim to the top edge. Just ensure all decorations are securely attached so they stay in place during use.
For a rustic or farmhouse-style theme, use natural fabrics like burlap and add touches of greenery or tiny pinecones. For a more glamorous approach, metallic fabrics with a touch of glitter can make your Christmas Cutlery Holder sparkle under candlelight.
Remember, there’s no right or wrong way to decorate—what matters most is that your holder reflects your personality and spreads holiday cheer.
While the primary purpose of this Christmas Cutlery Holder – Step by Step Tutorial is to create beautiful table décor, there are many other creative ways to use these adorable fabric holders. For instance, they can double as small gift pouches. You can slip in chocolates, candy canes, or small trinkets and give them as thoughtful handmade presents.
They also work wonderfully as part of your Christmas party decorations. You can hang them on the tree with tiny treats inside or place them on the mantel as part of your festive setup.
If you’re hosting a dinner party, your handmade holders can become conversation starters. Guests will appreciate the time and love you put into creating something so charming and useful.
Teachers, neighbors, and coworkers would also love receiving a Christmas Cutlery Holder as a handmade gift. Simply place a set of holiday-themed utensils inside and wrap them with a bow for an elegant presentation.
Another great idea is to create themed sets—such as reindeer-shaped holders for kids or snowflake designs for adults. This adds a personalized touch and makes everyone feel special.
No matter how you use them, these holders bring warmth and thoughtfulness to your Christmas celebrations, proving that small handmade touches can make a big difference.
1. What fabric is best for making a Christmas Cutlery Holder?
Cotton and felt are the best fabrics because they are easy to sew and come in many festive prints.
2. Can I make a Christmas Cutlery Holder without a sewing machine?
Yes! You can hand-stitch the edges or even use fabric glue for a no-sew version.
3. How long does it take to make one holder?
It usually takes about 20–30 minutes, depending on your skill level and design complexity.
4. Can I wash my Christmas Cutlery Holder?
If it’s made from cotton or felt, yes. Hand wash gently and air dry to keep it in good condition.
5. Can I use recycled materials for this project?
Absolutely! Old tablecloths, leftover fabric scraps, or worn-out clothes can be repurposed beautifully.
6. Are these holders suitable for kids’ crafts?
Yes, this is a safe and fun project for children, especially with supervision during cutting or sewing.
Making a Christmas Cutlery Holder – Step by Step Tutorial is a delightful way to bring handmade charm to your holiday season.
It’s an easy, creative, and rewarding craft that allows you to personalize your Christmas table and spread festive joy. From fabric selection to decoration, every step offers room for creativity and self-expression.
Now that you’ve learned how to make your own, why not give it a try and add a personal touch to your table décor this year? Don’t forget to share your experience—leave your honest opinion and suggestions. Your feedback helps make future tutorials even better and more inspiring for everyone who loves crafting during the holidays.


