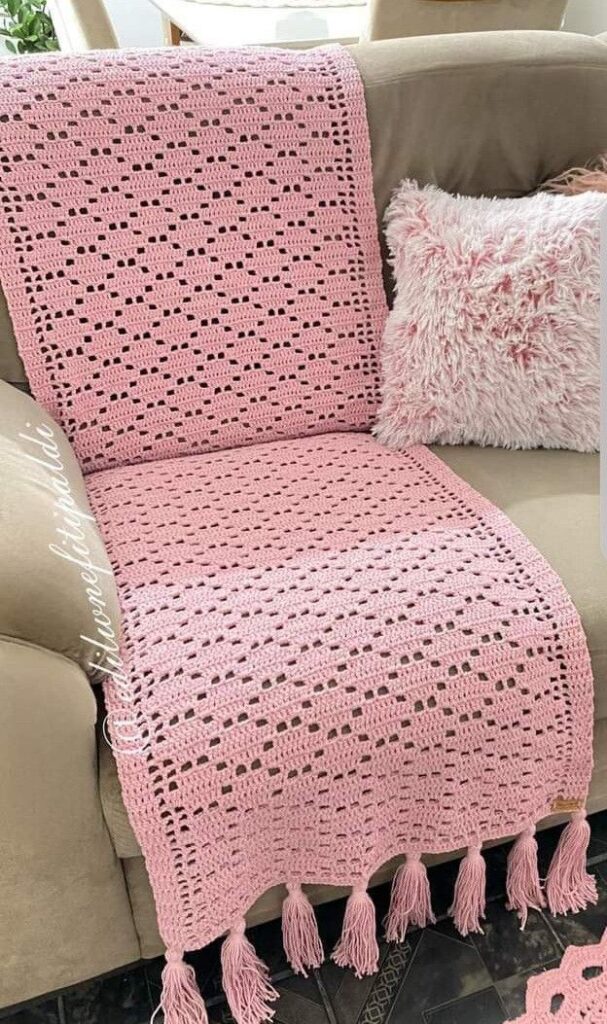
Elegant crocheted blanket

If you’ve ever wanted to add a stunning handmade piece to your home décor, learning how to crochet a star blanket pattern is a perfect choice. This beautiful design looks intricate but is actually beginner-friendly, especially when you follow this easy tutorial. With basic crochet stitches and a simple crochet pattern, you can create a stylish star-shaped blanket that’s perfect for gifts, baby showers, or your cozy space.
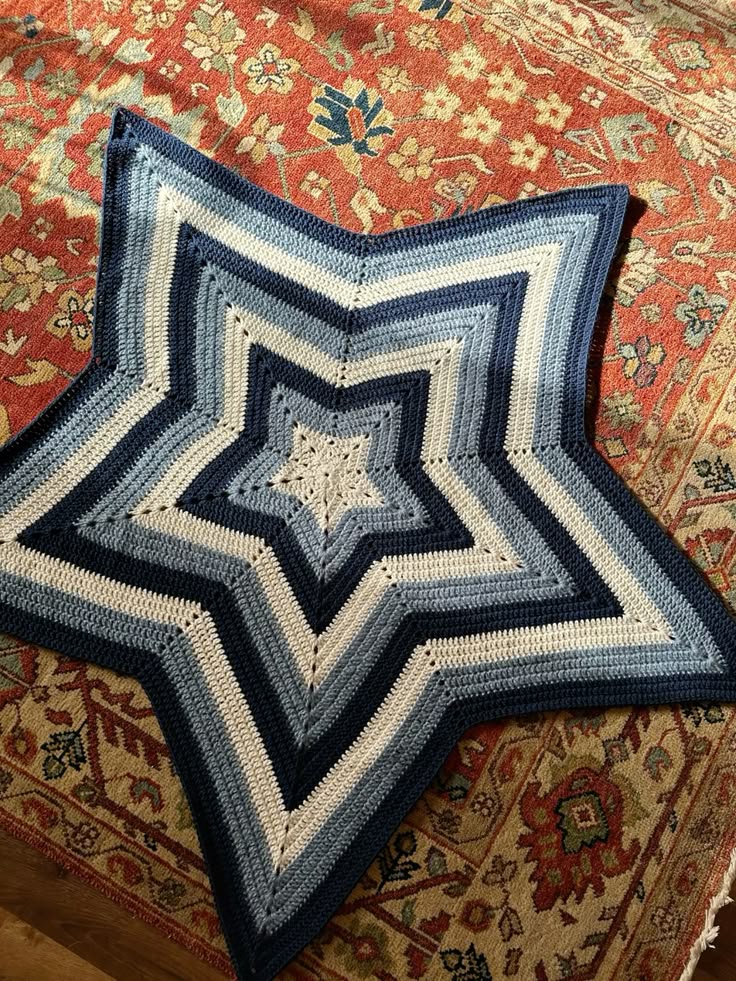
The beauty of a star blanket lies in its versatility. Whether you want to make a colorful baby blanket, a neutral home accent, or a statement piece with bold colors, the star blanket crochet pattern adapts to your personal style. Plus, you can customize the size easily by adding more rounds to make it larger.
In this tutorial, you’ll learn step by step how to crochet a star blanket pattern from start to finish. We’ll go through all the materials, measurements, stitches, and details you need to create your own masterpiece. This easy crochet pattern will help you grow your skills while crafting something beautiful and useful.
Before you start learning how to crochet a star blanket pattern, it’s essential to gather all the right materials and tools. The right yarn and hook size will make your project much smoother and help you achieve the correct size and texture.
You’ll need medium-weight yarn, preferably acrylic or cotton blends, for durability and softness. For a baby blanket size, you’ll need approximately 800–900 yards of yarn. If you plan to make a larger throw, you may need over 1200 yards.
A size 5.0 mm (H-8) crochet hook works well for this project, but always check your yarn label for recommendations. If your stitches seem too tight or too loose, you can adjust your hook size for a better result.
Other useful items include a pair of scissors, a yarn needle for weaving in ends, and stitch markers to help you keep track of your crochet pattern repeats. It’s also helpful to have a measuring tape to check the blanket’s dimensions as you go.
There’s no fabric cutting in this project, but it’s crucial to follow the crochet pattern carefully to maintain the star’s shape. Blocking at the end will also help to even out the stitches and keep the points sharp.
When choosing colors, consider using a single color for a minimalist look or multiple colors for a striped or gradient effect. Using color-changing yarn can also create a beautiful natural transition between rounds.
The first step in how to crochet a star blanket pattern is to create the center ring, which forms the base of your star. Start by making a slip knot and chaining 4. Join with a slip stitch to form a ring.
Into this ring, chain 3 (counts as your first double crochet). Then work 11 more double crochets into the center of the ring, giving you a total of 12 stitches. Join with a slip stitch to close the round.
The center ring is essential because it will hold all the points of the star. Make sure the stitches are evenly spaced to prevent the star from pulling too tightly in the middle.
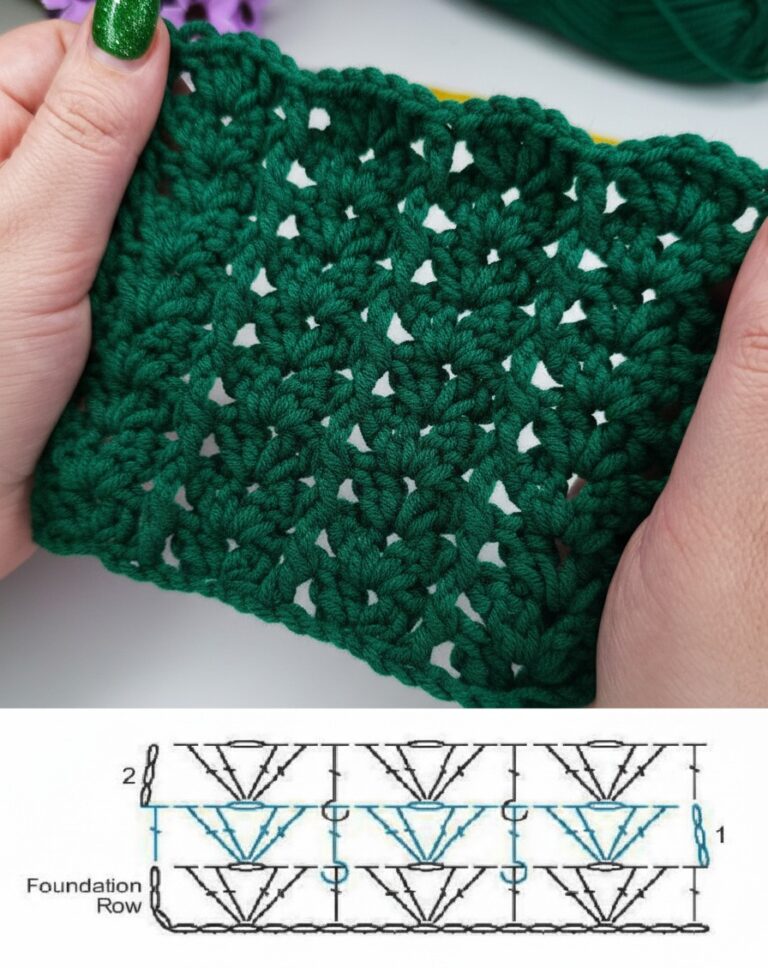
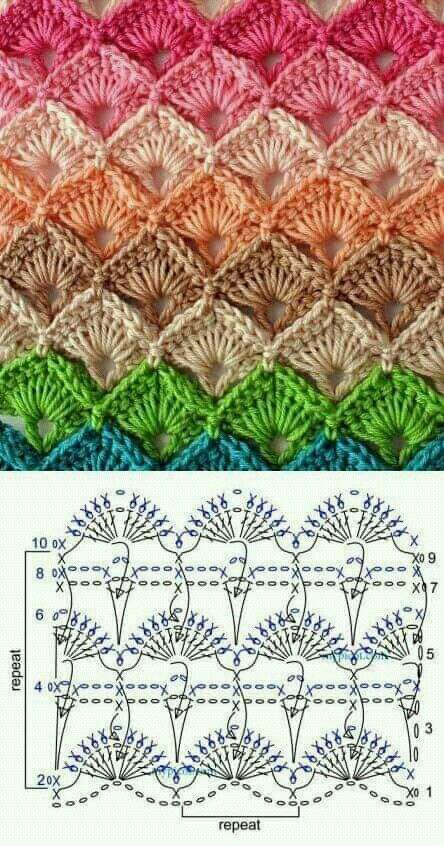
Next, you’ll begin forming the star points. Chain 3, double crochet into the same stitch, chain 2, double crochet into the next stitch twice. Repeat this sequence around the ring to create five points.
When you finish the first point round, join with a slip stitch. You’ll now see the beginnings of your star shape. Take your time here to ensure your tension is consistent.
This step is the foundation of your entire crochet pattern. If you start evenly and neatly, the rest of the blanket will build smoothly on this solid base.
Now that you’ve formed the center, you can begin building the star points in this easy crochet pattern. Each star point will grow by adding stitches into the chain spaces.
Chain 3 to start the round and work 2 double crochets into the chain-2 space from the previous round. Chain 2, then work 2 double crochets into the same chain-2 space. Continue this process in each point’s chain-2 space.
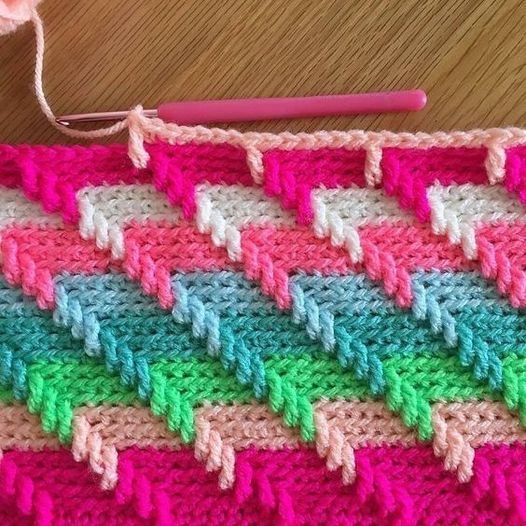
Between the star points, work double crochets along the sides to keep the blanket expanding evenly. These side stitches will increase as your star grows larger.
It’s important to remember to add increases at each star point to keep the blanket flat. Without the increases, the edges will start curling, and you’ll lose the star’s shape.
Use stitch markers at the tips of the star to easily identify where to add increases in each round. This will help you follow the crochet pattern without confusion as it becomes larger.
Continue working in rounds, repeating the same pattern: increase at the star tips, double crochets along the sides. As you add rounds, your star will slowly grow in size and the pattern will become more visible.
Pay close attention to your stitch count at each star point. Keeping the counts consistent will ensure your star blanket remains perfectly shaped.
As you continue how to crochet a star blanket pattern, the project becomes more exciting because you can easily customize it to your desired size. The larger the blanket, the more rounds you simply add.
If you want to create a baby-size star blanket, working approximately 20–25 rounds will usually give you a finished size of about 35 inches across. For a throw blanket, you can continue to 35–40 rounds or more.
Color changes are simple and fun in this crochet pattern. You can switch colors at the beginning of any round for stripes or use ombre yarn for a gradient effect. Make sure to weave in the yarn ends carefully to keep the back neat.
You can also add decorative borders. A round of single crochet or a scalloped edge can give your star blanket a beautiful finishing touch. Just remember to keep the increases at the star tips even when adding borders.
If your blanket starts to ripple or curl, this usually means the stitch counts are off, or your tension is too tight. You can fix this by adjusting your hook size or double-checking your increases.
This is a great project to make in various sizes: from tiny star coasters to large bed throws, this easy crochet pattern is flexible and enjoyable to work on for crafters at any level.
After you’ve reached your desired size, it’s time to finish the star blanket with some final steps that will ensure your project looks clean and professional.
Work a round of single crochet evenly around the edges to provide stability and a smooth finish. In each of the star’s tips, be sure to add an extra stitch to keep the points sharp and defined.
Weave in all yarn ends using a yarn needle, making sure they are secure and invisible. It’s important to neatly hide all yarn tails, especially if you’ve made color changes throughout the crochet pattern.
Blocking is a critical step to make your star blanket lay flat and enhance the star shape. Wet the blanket and lay it flat, gently pulling out each star point and pinning it in place until dry.
Care instructions: use gentle detergent and cold water if machine washing is necessary. Lay the blanket flat to dry to maintain its perfect star shape and prevent stretching.
Your finished star blanket makes a beautiful handmade gift or a cozy addition to your home. The shape, color options, and size possibilities make this crochet pattern one of the most versatile you can learn.
Once you’ve mastered how to crochet a star blanket pattern, you can confidently move on to other shaped blankets and creative projects using similar techniques.
Learning how to crochet a star blanket pattern is a rewarding project that combines creativity and relaxation. This easy crochet pattern is accessible for beginners and fun for advanced crafters looking to try something new.
With the right materials, careful attention to increases, and consistent stitch counts, you’ll soon have a perfectly shaped star blanket to cherish. Whether you’re making it for a baby, a gift, or for your own home, this project is sure to impress.
Remember to take your time, enjoy each stitch, and personalize your blanket with colors and borders that reflect your style. Crochet is not only about creating something functional but also about expressing yourself through your handmade work.
Thank you for following this How to Crochet a Star Blanket Pattern | Tutorial EASY. Happy crocheting!

