
Twisted Post Quilt Pattern

Fish-shaped fabric organizer for hanging – Step by Step Tutorial is a creative and practical project that combines functionality, decorative charm, and accessible sewing techniques into one unique handmade item. In this detailed article, you will learn how to create a fish-shaped fabric organizer for hanging using a clear step by step tutorial approach, ideal for beginners and experienced crafters alike. This type of organizer is perfect for storing small items while adding personality to any room, making it both useful and visually appealing.
A fish-shaped fabric organizer for hanging – step by step tutorial is especially popular in homes that value handmade décor, children’s rooms, bathrooms, craft spaces, and even kitchens. The fish shape adds a playful element, while the hanging design ensures efficient use of vertical space. Throughout this article, the main focus will remain on explaining each phase of the process clearly, using accessible language and SEO-friendly structure, while keeping all content compliant with Google AdSense policies.
By following this fish-shaped fabric organizer for hanging – step by step tutorial, you will understand not only how to assemble the organizer but also how to adapt it to your personal style. Fabric choices, pocket sizes, hanging methods, and finishing touches will all be explained in depth. The goal is to empower you to create a long-lasting, attractive organizer that reflects creativity and craftsmanship while remaining practical for everyday use.
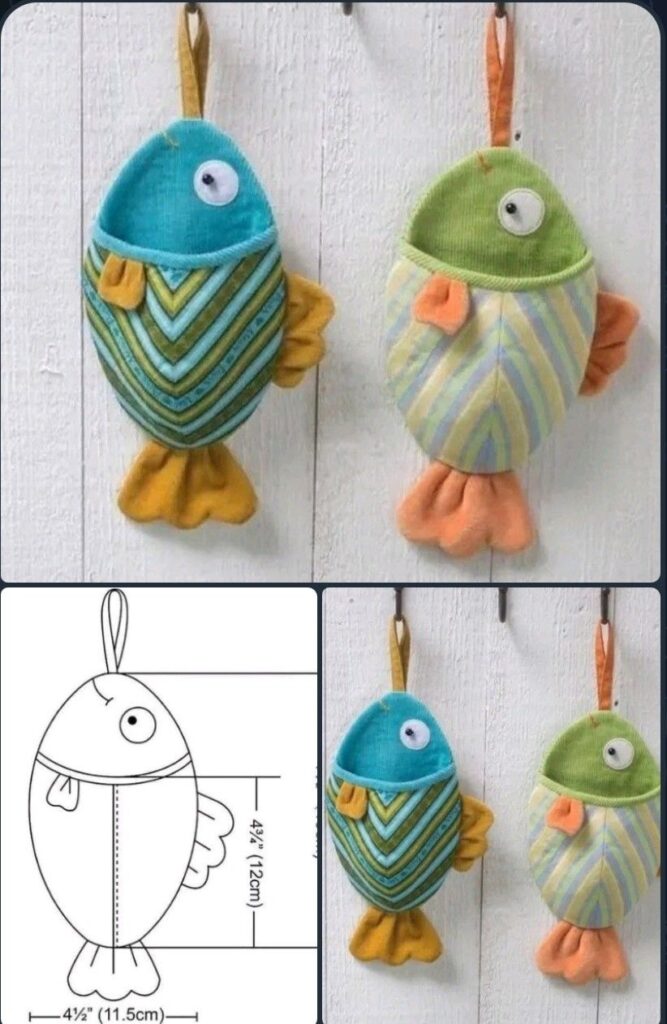
A fish-shaped fabric organizer for hanging is essentially a textile storage solution designed in the silhouette of a fish. The body of the fish typically contains pockets, while the tail or top section is used for hanging. This design allows the organizer to function as wall storage while doubling as decorative art.
The concept behind this organizer is rooted in maximizing space without sacrificing aesthetics. Hanging organizers are ideal for small areas, and the fish shape introduces an element of fun and originality. This makes the step by step tutorial especially valuable for those who want to combine sewing skills with home organization.
Another advantage of the fish-shaped fabric organizer for hanging is its versatility. It can be used to store sewing tools, toiletries, toys, art supplies, or even mail. The internal pockets can be customized in size and number, depending on the intended use.
The fish design also allows for creative freedom. You can choose realistic fish shapes, cartoon-style fish, or abstract interpretations. This flexibility makes the fish-shaped fabric organizer for hanging – step by step tutorial suitable for different décor styles, from nautical themes to modern handmade interiors.
Fabric selection plays a key role in defining the final look. Cotton fabrics are commonly used due to their durability and ease of sewing, but linen, canvas, or recycled textiles can also be incorporated. Color patterns such as scales, stripes, or solid tones can enhance the fish motif.
Overall, understanding the purpose and structure of this organizer is essential before starting the tutorial. It ensures that each step in the step by step tutorial is applied with intention and clarity.
Before starting the fish-shaped fabric organizer for hanging – step by step tutorial, proper preparation is crucial. Gathering all materials in advance ensures a smooth and enjoyable crafting experience without interruptions or mistakes.
The main materials include fabric for the front and back of the fish, fabric for the pockets, thread that matches or complements the fabric, and basic sewing tools. Optional materials such as interfacing or batting can be used to add structure to the organizer.
Choosing the right fabric is especially important in this fish-shaped fabric organizer for hanging project. Medium-weight fabrics are ideal, as they hold shape well while remaining flexible enough to sew. Avoid overly stretchy fabrics, as they may distort the fish shape.
You will also need a paper pattern or template of the fish shape. This can be hand-drawn or printed, depending on your preference. The template ensures symmetry and consistency throughout the step by step tutorial.
Preparation also involves cutting the fabric accurately. Precision at this stage prevents alignment issues later in the sewing process. Marking pocket placement clearly on the fabric helps maintain balance and functionality in the organizer.
Finally, preparing your workspace contributes to better results. A clean, well-lit area allows you to follow the fish-shaped fabric organizer for hanging – step by step tutorial with focus and confidence, reducing the likelihood of errors.
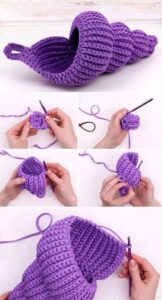
The sewing phase is where the fish-shaped fabric organizer for hanging – step by step tutorial truly comes to life. This stage involves assembling the pockets, shaping the fish body, and joining all elements into a cohesive piece.
Begin by sewing the pockets onto the front piece of the fish. Pockets are usually placed along the fish’s body, layered vertically or horizontally. Reinforcing the top edges of each pocket ensures durability and frequent use.
Once the pockets are secure, align the front and back fish pieces with right sides facing each other. Carefully stitch around the edges, leaving a small opening for turning the piece right-side out. This step is critical in maintaining the fish shape.
After turning the organizer, gently push out the curves using a blunt tool to define the fins and tail. If desired, lightly press the fabric with an iron to achieve a crisp finish. This enhances the professional appearance of the fish-shaped fabric organizer for hanging.
At this stage, you can add light stuffing or interfacing if you want the organizer to have more structure. This step is optional but can elevate the final result of the step by step tutorial.
Finally, close the opening with a neat hand stitch or topstitch. Take your time here, as this finishing detail contributes to the overall quality and longevity of the organizer.
The final stage of the fish-shaped fabric organizer for hanging – step by step tutorial focuses on making the organizer functional and visually complete. Hanging methods and decorative details play a significant role in usability.
Common hanging options include fabric loops, wooden rings, or stitched-in straps. The hanging element is usually attached to the top of the fish or integrated into the dorsal fin area. Secure stitching is essential to support the weight of stored items.
Choosing the right hanging method depends on where the organizer will be displayed. For walls, loops work well, while hooks or rods may require reinforced attachments. This adaptability makes the fish-shaped fabric organizer for hanging highly practical.
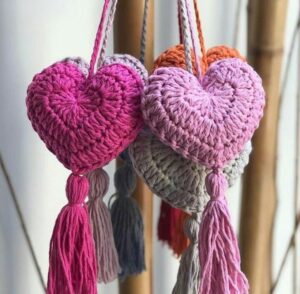
Decorative elements can now be added. Embroidered eyes, fabric appliqués, or contrast stitching can enhance the fish design without overwhelming it. These details personalize the organizer and align it with your décor style.
Edge topstitching around the fish outline not only strengthens the seams but also adds a polished look. This small detail can significantly improve the overall appearance of the step by step tutorial project.
Once complete, test the organizer by hanging it and placing items inside the pockets. This ensures balance, durability, and functionality, confirming that the fish-shaped fabric organizer for hanging – step by step tutorial has been successfully executed.
What is a fish-shaped fabric organizer for hanging used for
A fish-shaped fabric organizer for hanging is used to store small items such as craft supplies, toiletries, toys, or accessories while serving as decorative wall art.
Is this step by step tutorial suitable for beginners
Yes, the step by step tutorial is designed to be beginner-friendly, using basic sewing techniques and clear instructions.
What fabric works best for this project
Cotton or canvas fabrics are ideal for a fish-shaped fabric organizer for hanging because they are durable, easy to sew, and hold shape well.
Can I customize the size of the organizer
Absolutely. The step by step tutorial can be adapted by resizing the fish template and adjusting pocket dimensions.
How do I clean the fabric organizer
Most fabric organizers can be gently hand-washed or spot-cleaned, depending on the fabric used.
Is this organizer suitable for children’s rooms
Yes, the playful design of the fish-shaped fabric organizer for hanging makes it especially popular for children’s spaces.
This fish-shaped fabric organizer for hanging – step by step tutorial has demonstrated how creativity and functionality can be seamlessly combined in a single handmade project. From understanding the concept and preparing materials to sewing, assembling, and finishing, each stage was explained to ensure clarity and confidence.
By following this tutorial, you learned how to create a decorative yet practical organizer that enhances space organization while adding personality to any room. The adaptability of the design allows endless customization, making each organizer unique.
I sincerely invite you to leave an honest opinion about this tutorial and share any suggestions or ideas you may have. Your feedback is valuable and helps improve future step by step guides for creative projects like this one.


