How to Crochet a Giant Granny Square Blanket (Perfect for Beginners!)
Advertising
If you’re new to the world of crochet, starting with a timeless and versatile project like a giant granny square blanket is a wonderful way to learn and build confidence. This type of blanket is not only cozy and stylish but also incredibly beginner-friendly. With just a few simple stitches and some patience, anyone can create a beautiful piece that adds warmth and charm to any space.
The beauty of the giant granny square lies in its simplicity. Unlike more complex crochet patterns that require multiple panels or detailed shaping, this project grows outward in one continuous square, making it easy to follow and highly customizable. Whether you want to make a lap blanket, baby gift, or full-sized throw, this pattern allows you to expand it as large as you like.
Advertising
In this post, you’ll learn everything you need to know about how to crochet a giant granny square blanket, including the essential materials, stitch techniques, size tips, and a detailed step-by-step guide. Let’s dive into this classic crochet project that’s perfect for beginners and experts alike!
Before picking up your hook, it’s important to gather the right materials. Having everything ready will make your crocheting process smooth and enjoyable from start to finish.
Yarn Type: Choose a medium-weight yarn (Category 4) like acrylic, cotton, or a cotton blend. These yarns are soft, easy to handle, and washable—ideal for blankets. Popular brands include Red Heart Super Saver, Caron One Pound, or Paintbox Yarns.
Hook Size: Use a 5.5 mm (I-9) or 6.0 mm (J-10) hook. The hook size can vary depending on your chosen yarn, but these sizes work well for most worsted-weight options.
Yarn Quantity: For a standard throw-size blanket (approximately 50″ x 60″), you’ll need about 2,000 to 2,500 yards of yarn. If using multiple colors, divide your total accordingly.
Scissors and Stitch Marker: Keep scissors nearby to trim ends, and a stitch marker can help you keep track of rounds.
Tapestry Needle: Essential for weaving in ends when your blanket is complete.
Color Planning: Choose 2–4 colors for a classic look or use a gradient yarn for effortless color changes. The color changes can be done every few rounds or randomly for a unique design.
🔄 Step-by-Step: Starting Your Giant Granny Square
Let’s get started with the foundational steps of this beginner-friendly crochet pattern. This classic square design grows in rounds, and each round builds evenly on the last, making it easy to keep your project symmetrical.
Step 1 – The Magic Circle: Begin with a magic circle or chain 4 and join with a slip stitch to form a ring. Chain 3 (counts as your first double crochet), then work 2 double crochets (dc) into the ring.
Step 2 – First Round Corners: Chain 2 (this forms your first corner), then work 3 dc into the ring. Repeat the “ch 2, 3 dc” sequence two more times, so you have 4 groups of 3 dc, separated by ch-2 spaces.
Step 3 – Close the Round: Join to the top of the initial chain-3 with a slip stitch. You should now have a small square with four corners formed by ch-2 spaces.
Step 4 – Start the Second Round: Slip stitch into the next two stitches and into the first corner space. Chain 3 (counts as first dc), work 2 dc, ch 2, and 3 dc into that corner.
Step 5 – Work Around: In the next 3 corners, work 3 dc, ch 2, 3 dc into each. Slip stitch into the top of the starting chain to complete the round.
Step 6 – Keep Growing: Each new round will have more dc groups along each side. Continue working into each corner with 3 dc, ch 2, 3 dc. In the spaces between corners, simply place 3 dc. Your square will grow as you add more rounds.
🎨 Adding Color, Texture, and Personal Flair
Now that your square is growing, it’s time to have some fun with color changes and textured stitches. These elements bring your crochet pattern to life and make it truly your own.
Advertising
Color Changes: Switch yarns every few rounds for stripes, or use a new color for each round for a rainbow effect. Always change colors at the slip stitch join to keep transitions clean.
Texture Variation: While traditional granny squares use dc stitches, you can mix it up by adding puff stitches, bobbles, or clusters to give your blanket dimension and interest.
Corner Sharpness: Keep your corners neat by always working 3 dc, ch 2, 3 dc into each ch-2 space. If your blanket starts curling, your tension may be too tight; if it waves, you may be adding too many stitches.
Blocking Tips: Once your blanket reaches your desired size, wet block it on a flat surface to help square out the edges and make it lay flat.
Border Options: Add a final border around the entire blanket using a shell stitch, crab stitch, or even a simple sc row to finish cleanly.
Measuring Your Blanket: Measure from corner to corner across to determine your blanket size. You can stop growing your square once it reaches your preferred dimensions.
🪡 Finishing Touches and Troubleshooting
With your giant granny square blanket nearly finished, there are a few more steps to ensure it looks polished and lasts for years. Proper finishing makes all the difference in a handmade project.
Weaving in Ends: Use your tapestry needle to weave yarn tails into the stitches. Try to match the direction of the stitch for an invisible finish. Weave in at least 2 inches of yarn to prevent unraveling.
Adding a Label: Consider attaching a custom “Handmade with Love” label to personalize your project. This adds charm, especially if you’re giving the blanket as a gift.
Washing and Blocking: Gently hand-wash or machine wash (depending on yarn type) your finished blanket. Block it flat to ensure clean lines and even edges.
Fixing Mistakes: If you realize a mistake a few rows back, don’t worry! Simply rip back (a.k.a. “frog”) the stitches and rework the section. Crochet is forgiving.
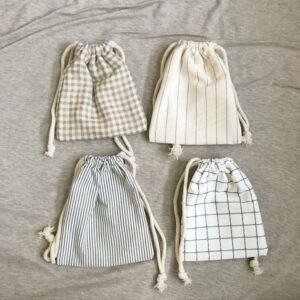
Storage Tips: Store your blanket in a breathable cotton bag if not in use to avoid dust or yarn pilling.
Gifting Ideas: Wrap your blanket with ribbon or place it in a decorative basket for gifting. Add a tag with care instructions if needed.
🧵 Final Thoughts: Enjoying the Crochet Journey
Learning how to crochet a giant granny square blanket is a rewarding project that builds both your skill and your confidence. It’s the kind of crochet pattern you can return to again and again, adjusting the size and style to suit your needs. Whether you keep it for yourself, donate it, or gift it to a loved one, it will always be a treasure.
This project embodies the spirit of crochet: relaxing, creative, and beautifully imperfect. The gentle rhythm of adding round after round can be therapeutic, and watching your square grow is incredibly satisfying. Plus, it’s a great opportunity to practice color theory, yarn types, and tension control.
The simplicity of the granny square makes it the ideal foundation for countless other projects too. Once you master this basic concept, you can explore granny square bags, tops, cardigans, or even patchwork-style blankets made from multiple squares.
So grab your hook, pick out your favorite yarn, and start your crochet journey today. Your first (or next!) giant granny square blanket is just a few rounds away from being your new favorite piece!


